I get as much enjoyment out of the post processing part of digital photography, spend as much time trying to keep up with the developments in the digital darkroom as with the cameras themselves. 
I think that with so many people out there taking photos nowadays, we all need some other strings to our bows to get noticed. 
So, this section on my site will cover a bit of that, and look under the bonnet at some of the pieces that I create.
6th January 2023
Wolf Moon faked 
All the clouds around meant it wasn't looking likely this full moon wasn't going to show for me in January, so, for a bit of fun and in response to some of the god awful faked moon pics that do the rounds every four weeks, I thought I'd have a go at one and get it out of my system.
Had a wander around Larbert Loch up near the hospital just before the moonrise, and had taken a few shots. And, with a shot of last month's full moon setting over the Ochil Hills I had the images ready to go.

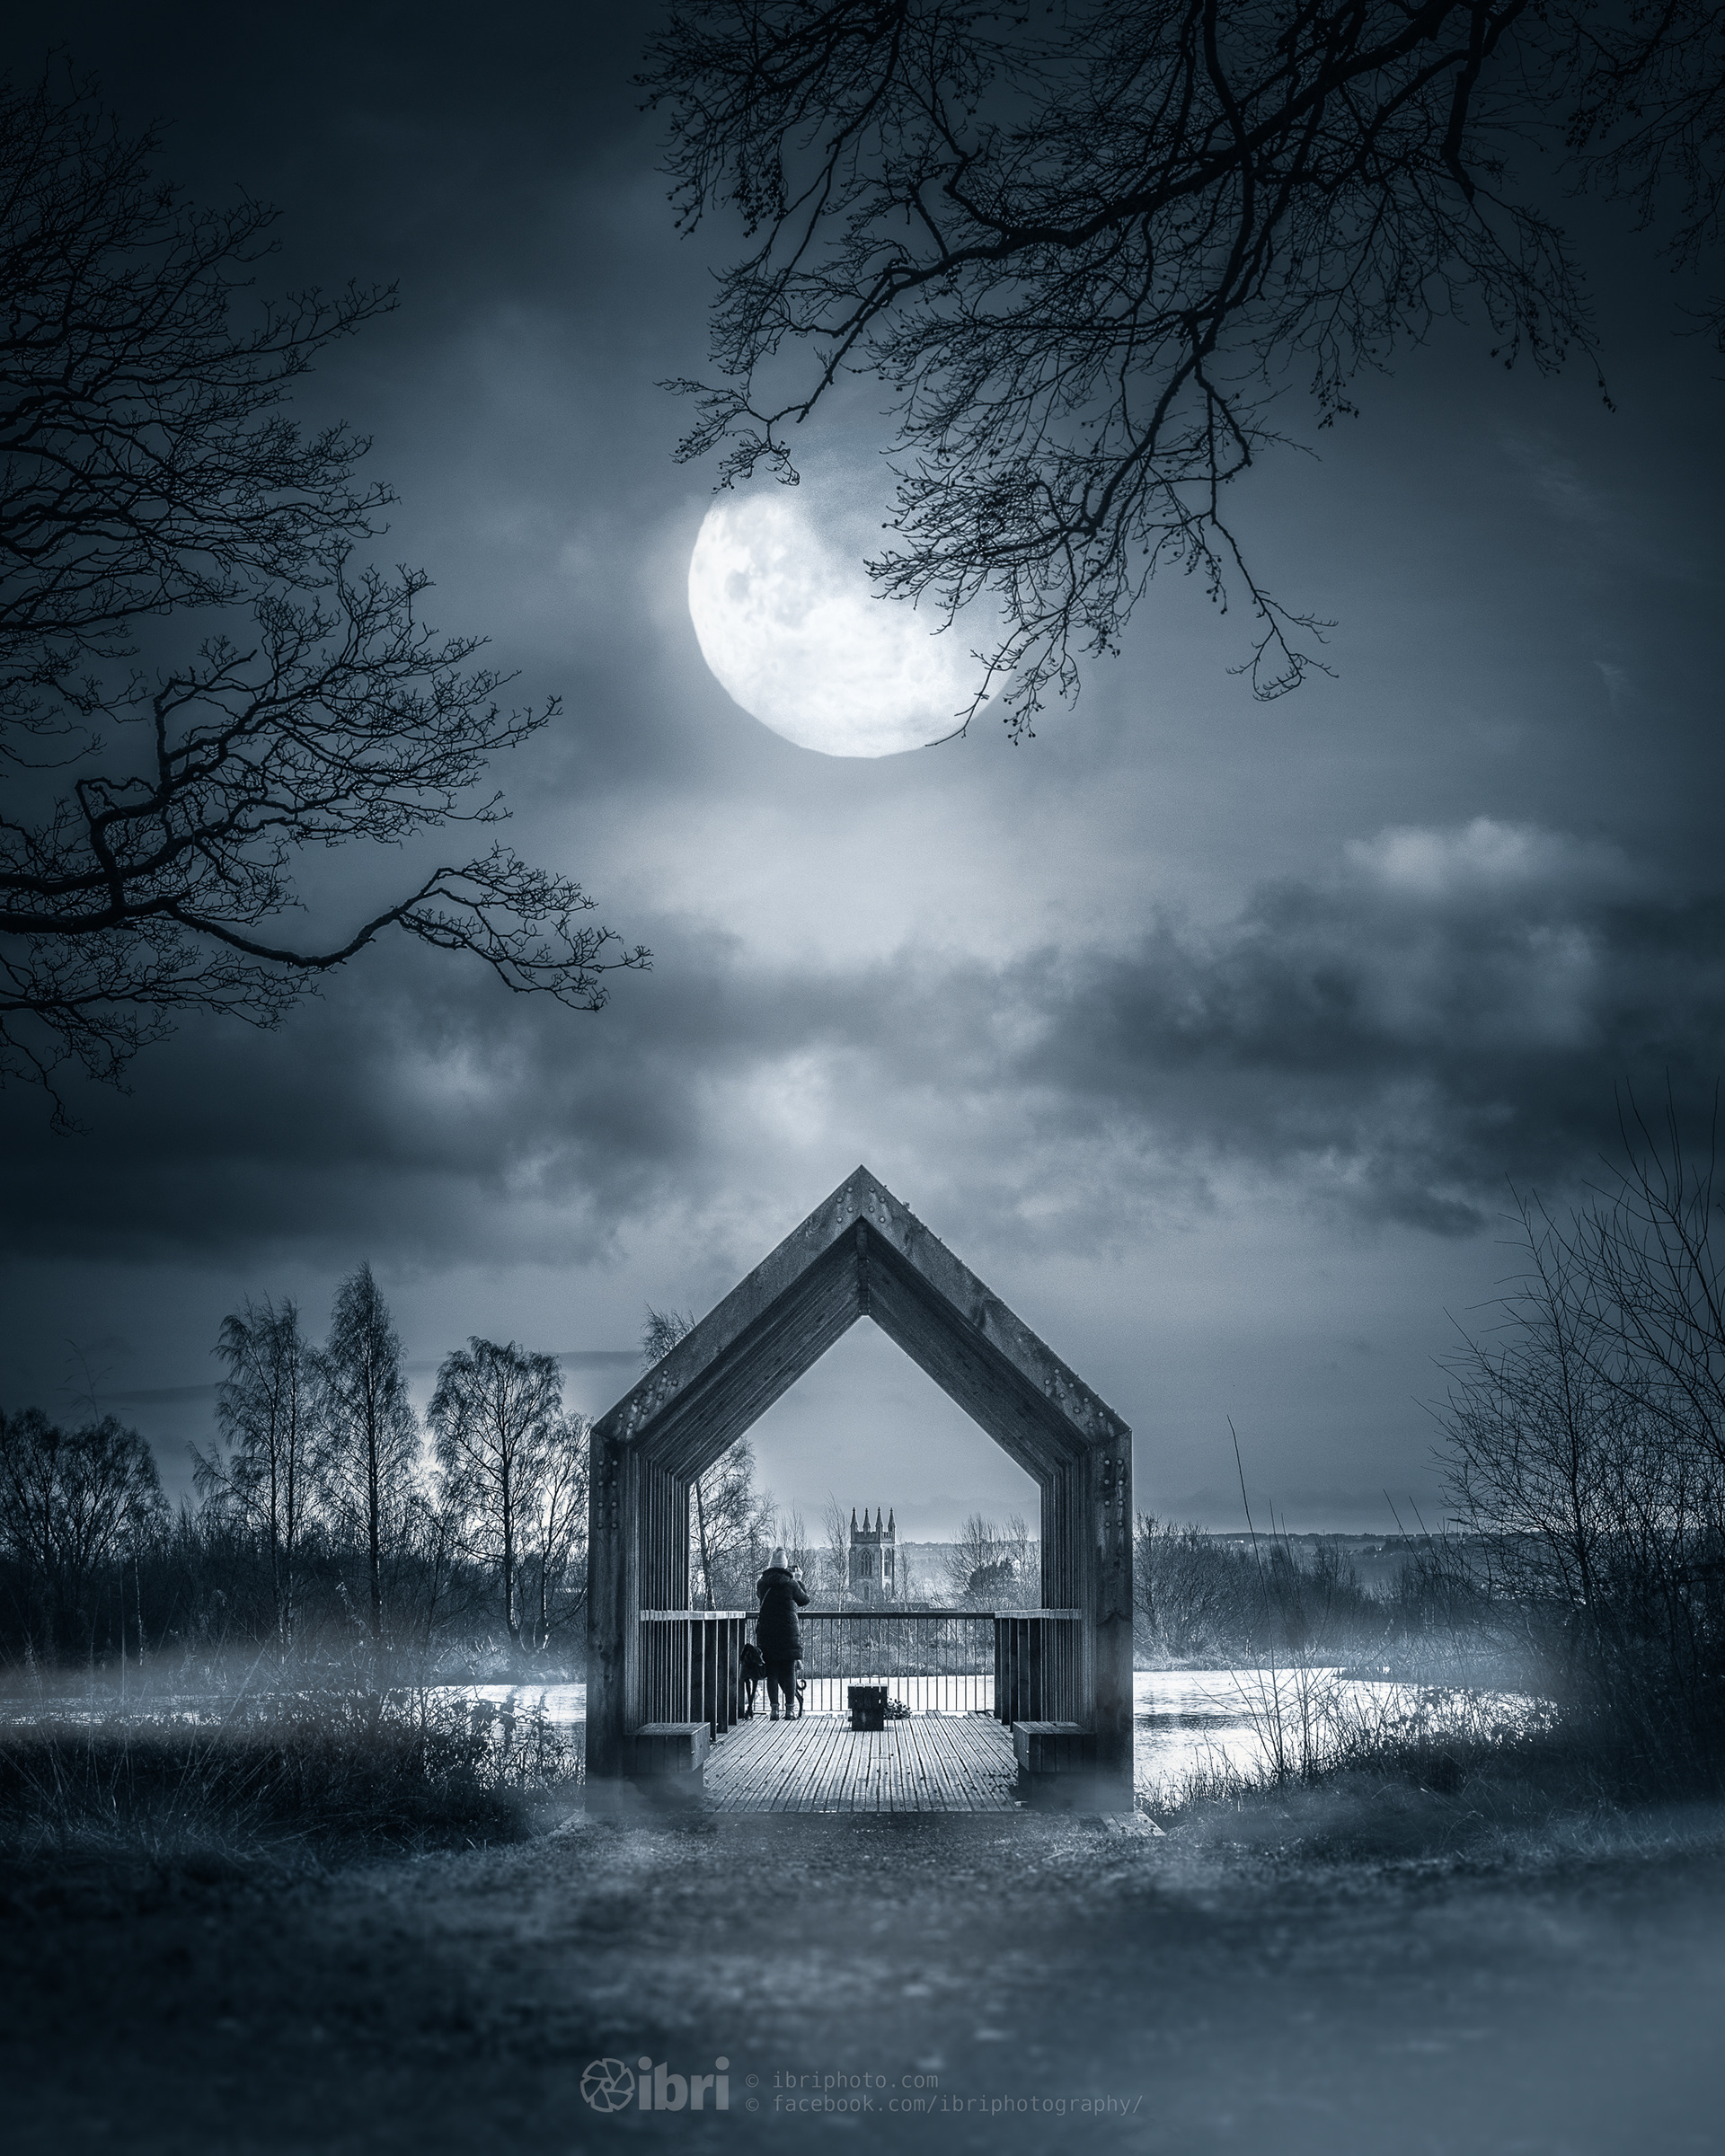
The final image here, very much only the two images, some custom brushes and a bit of colour grading and stuff. Adobe Lightroom, Adobe Photoshop and a Wacom Tablet the only tools (and some Genesis - Trick of The Tail playing in the background. Don't you DARE judge...)
The images below show the creative process taken to get to the image above - with some scribblings and captions to cover and try to explain the steps taken.

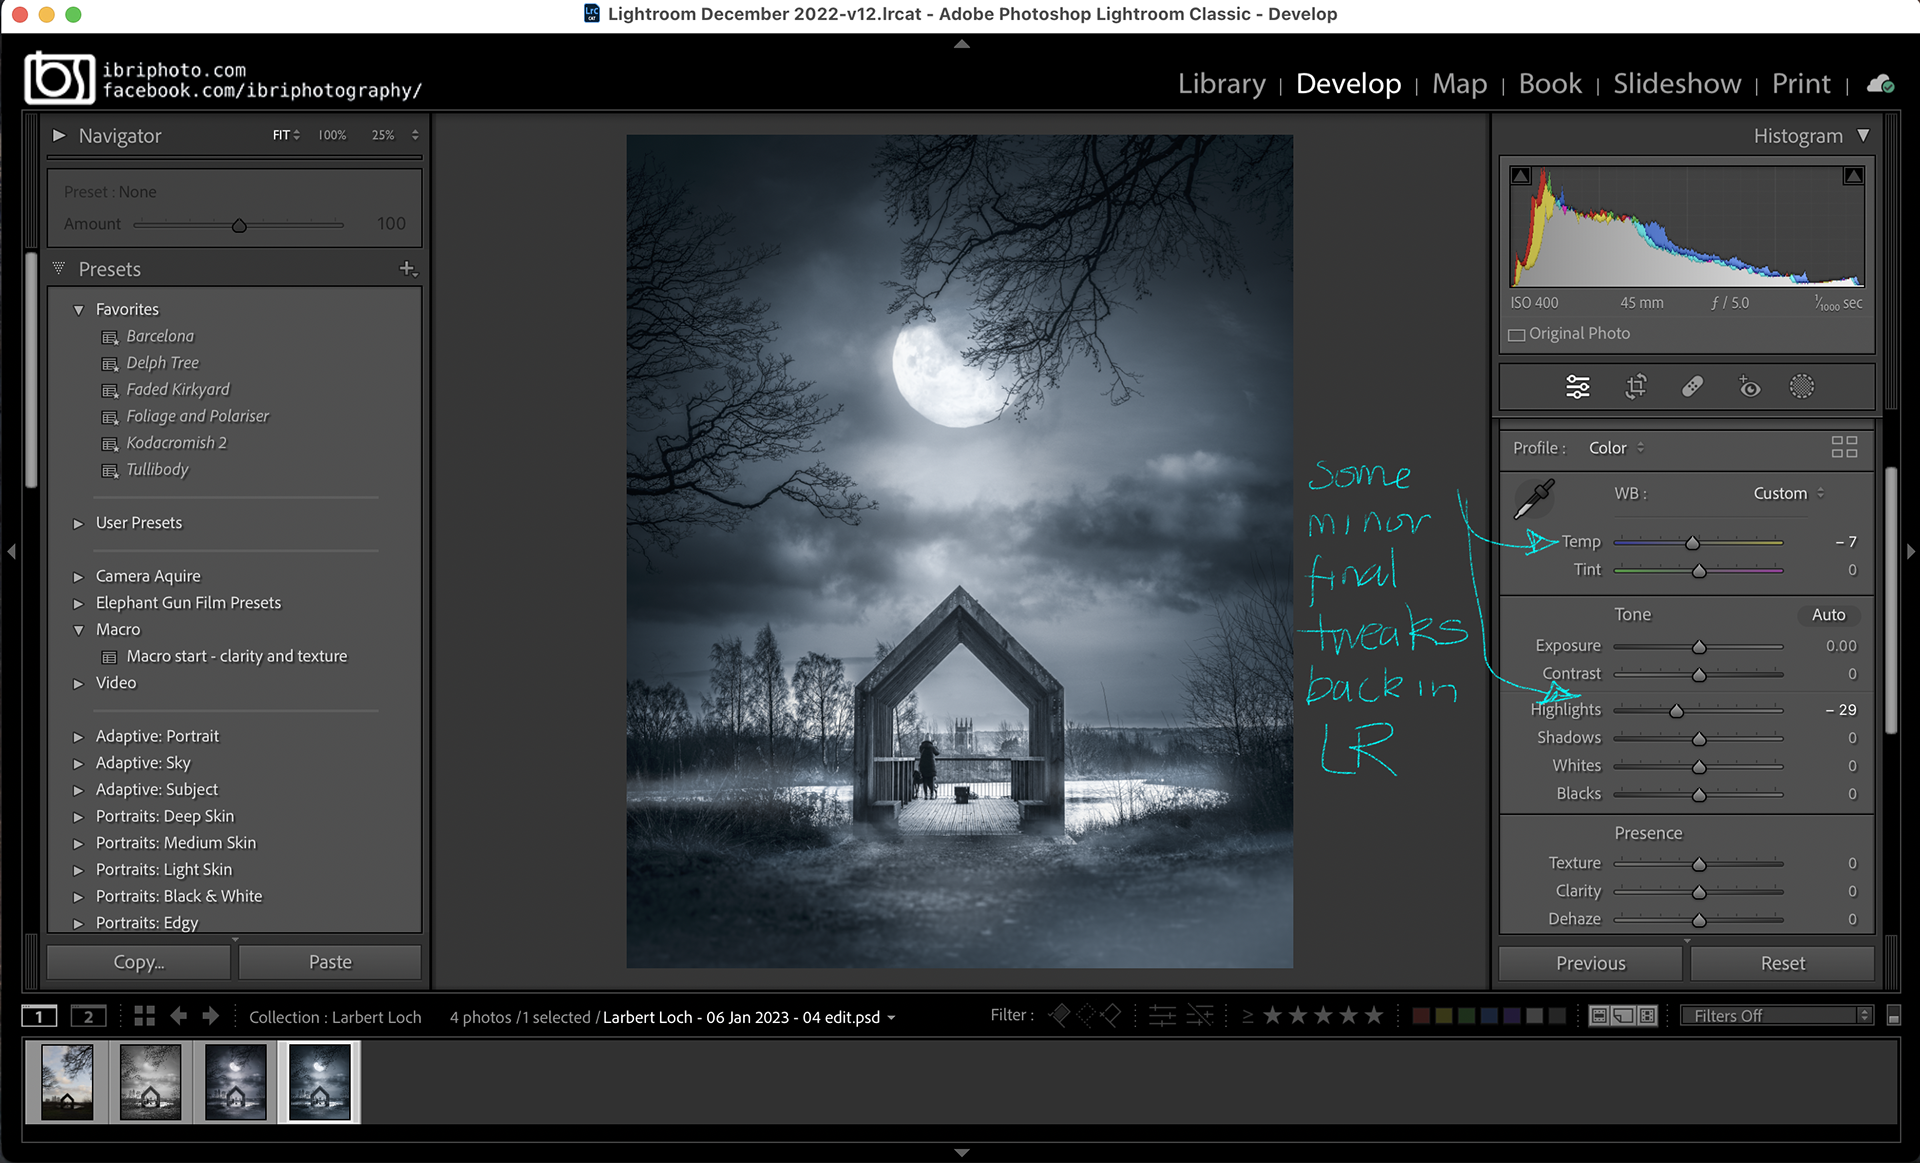
After importing and organising all the RAW shots into Lightroom (LR), a suitable image was selected and edited to improve the global look of the photo.
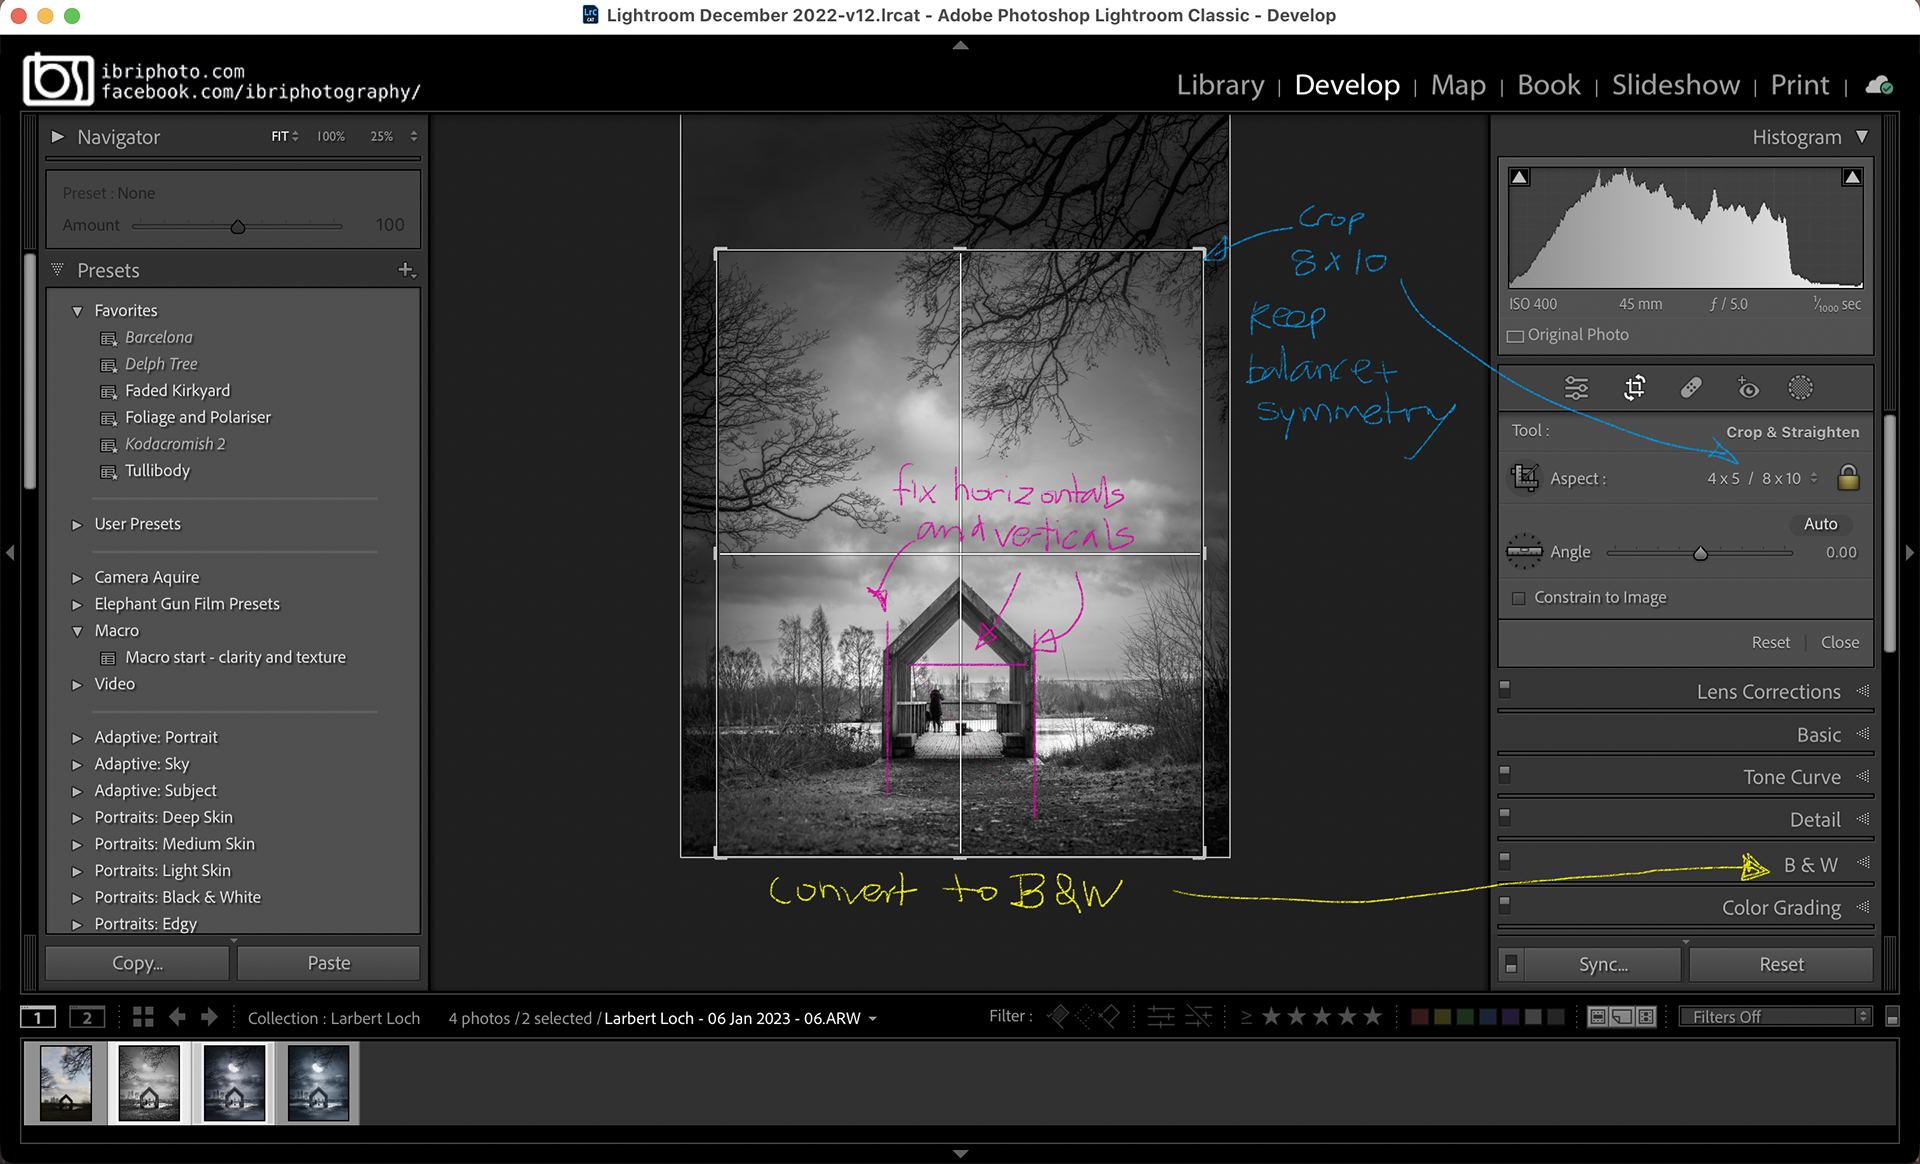
I’d decided by this point it was going to work better in monochrome, so converted it to Black and White in Lightroom too. Used the Guided Transform tool in LR to to fix the horizontals and verticals (the photo had been taken from ground level looking up, so those were a bit off). Not sure why I cropped it to 8x10 / 4x5 format here as it’s something I normally do last; maybe the Laphroaig was kicking in by this point.
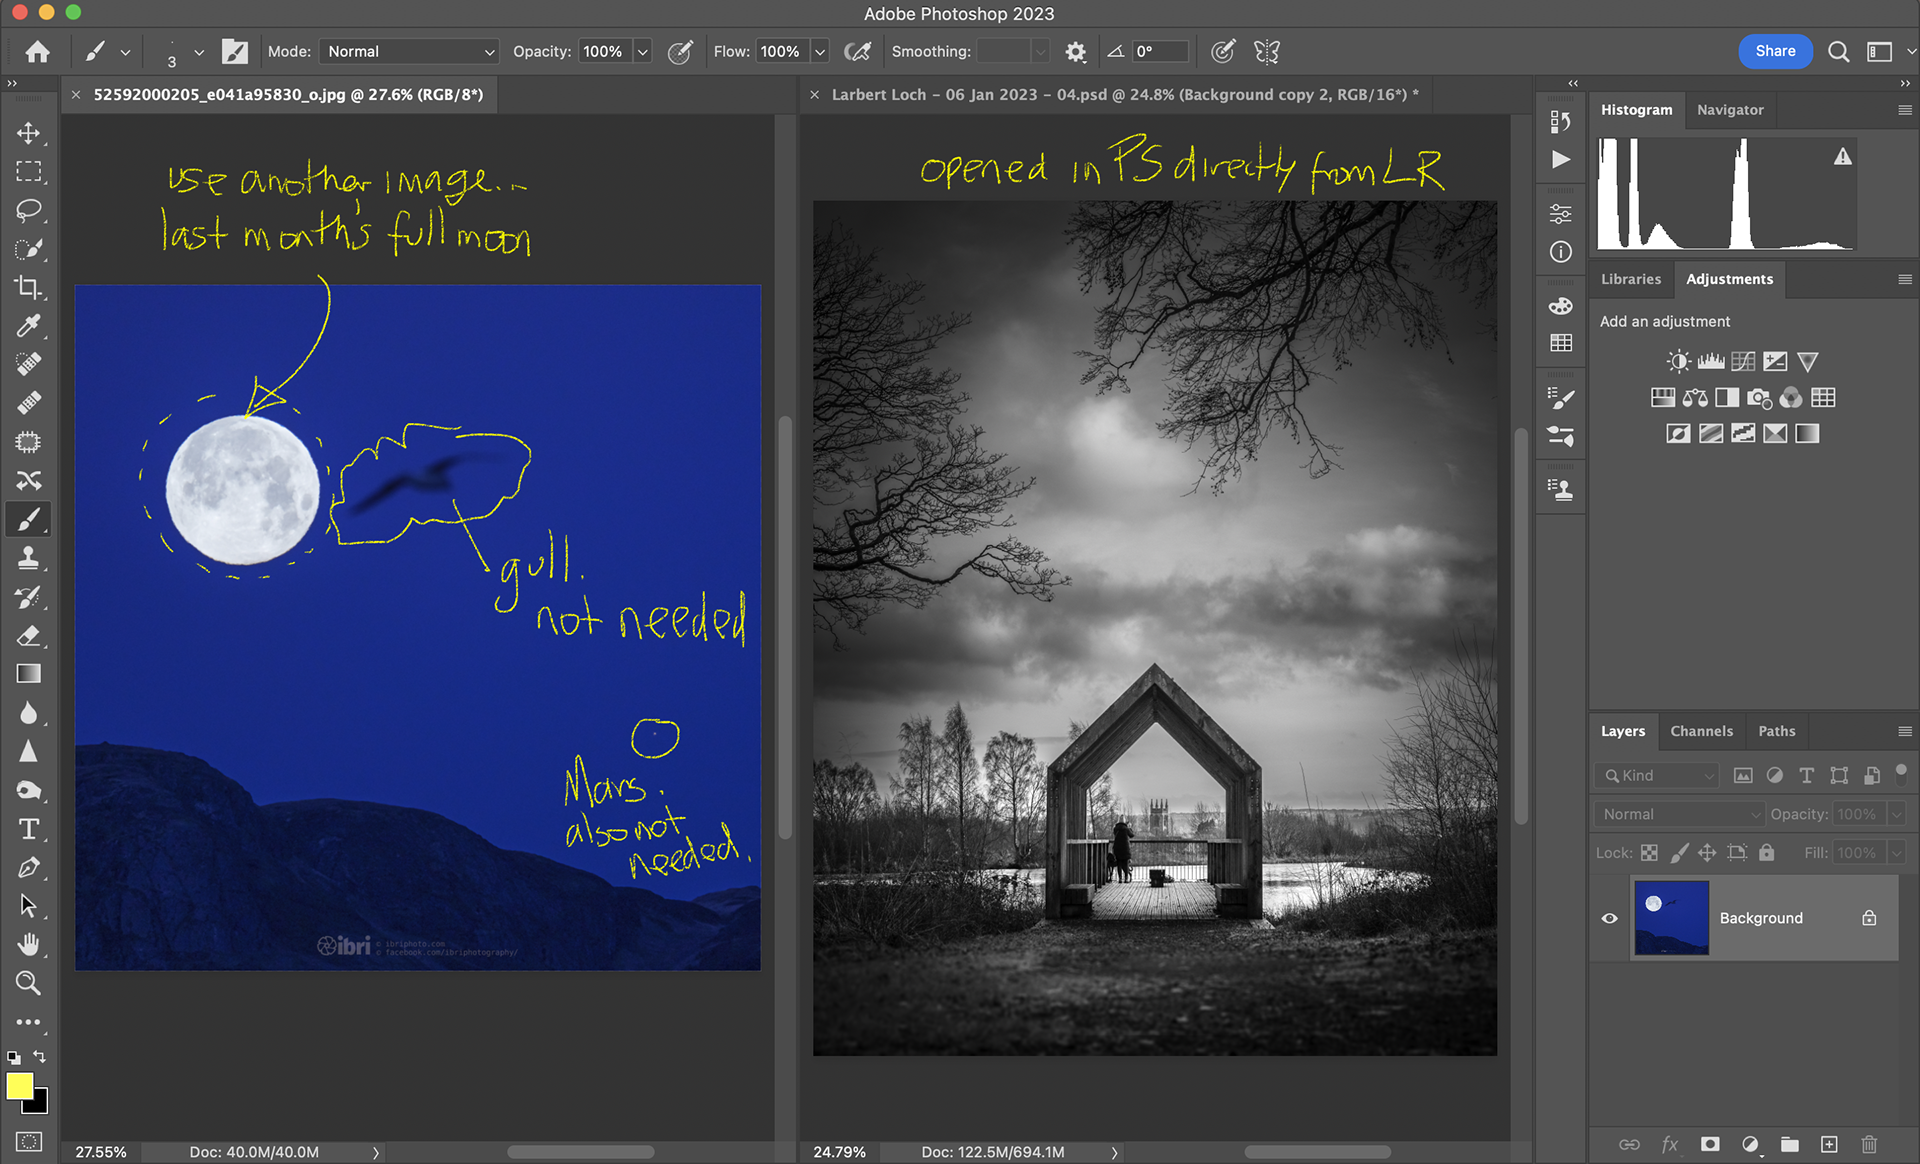
Time to switch to Photoshop (PS) now. Lightroom is great, and recent improvements have seen me using it less, but all the really creative stuff happens over here in PS. Both images opened - one after downloading from my Flickr, the main image opened directly from LR into PS.
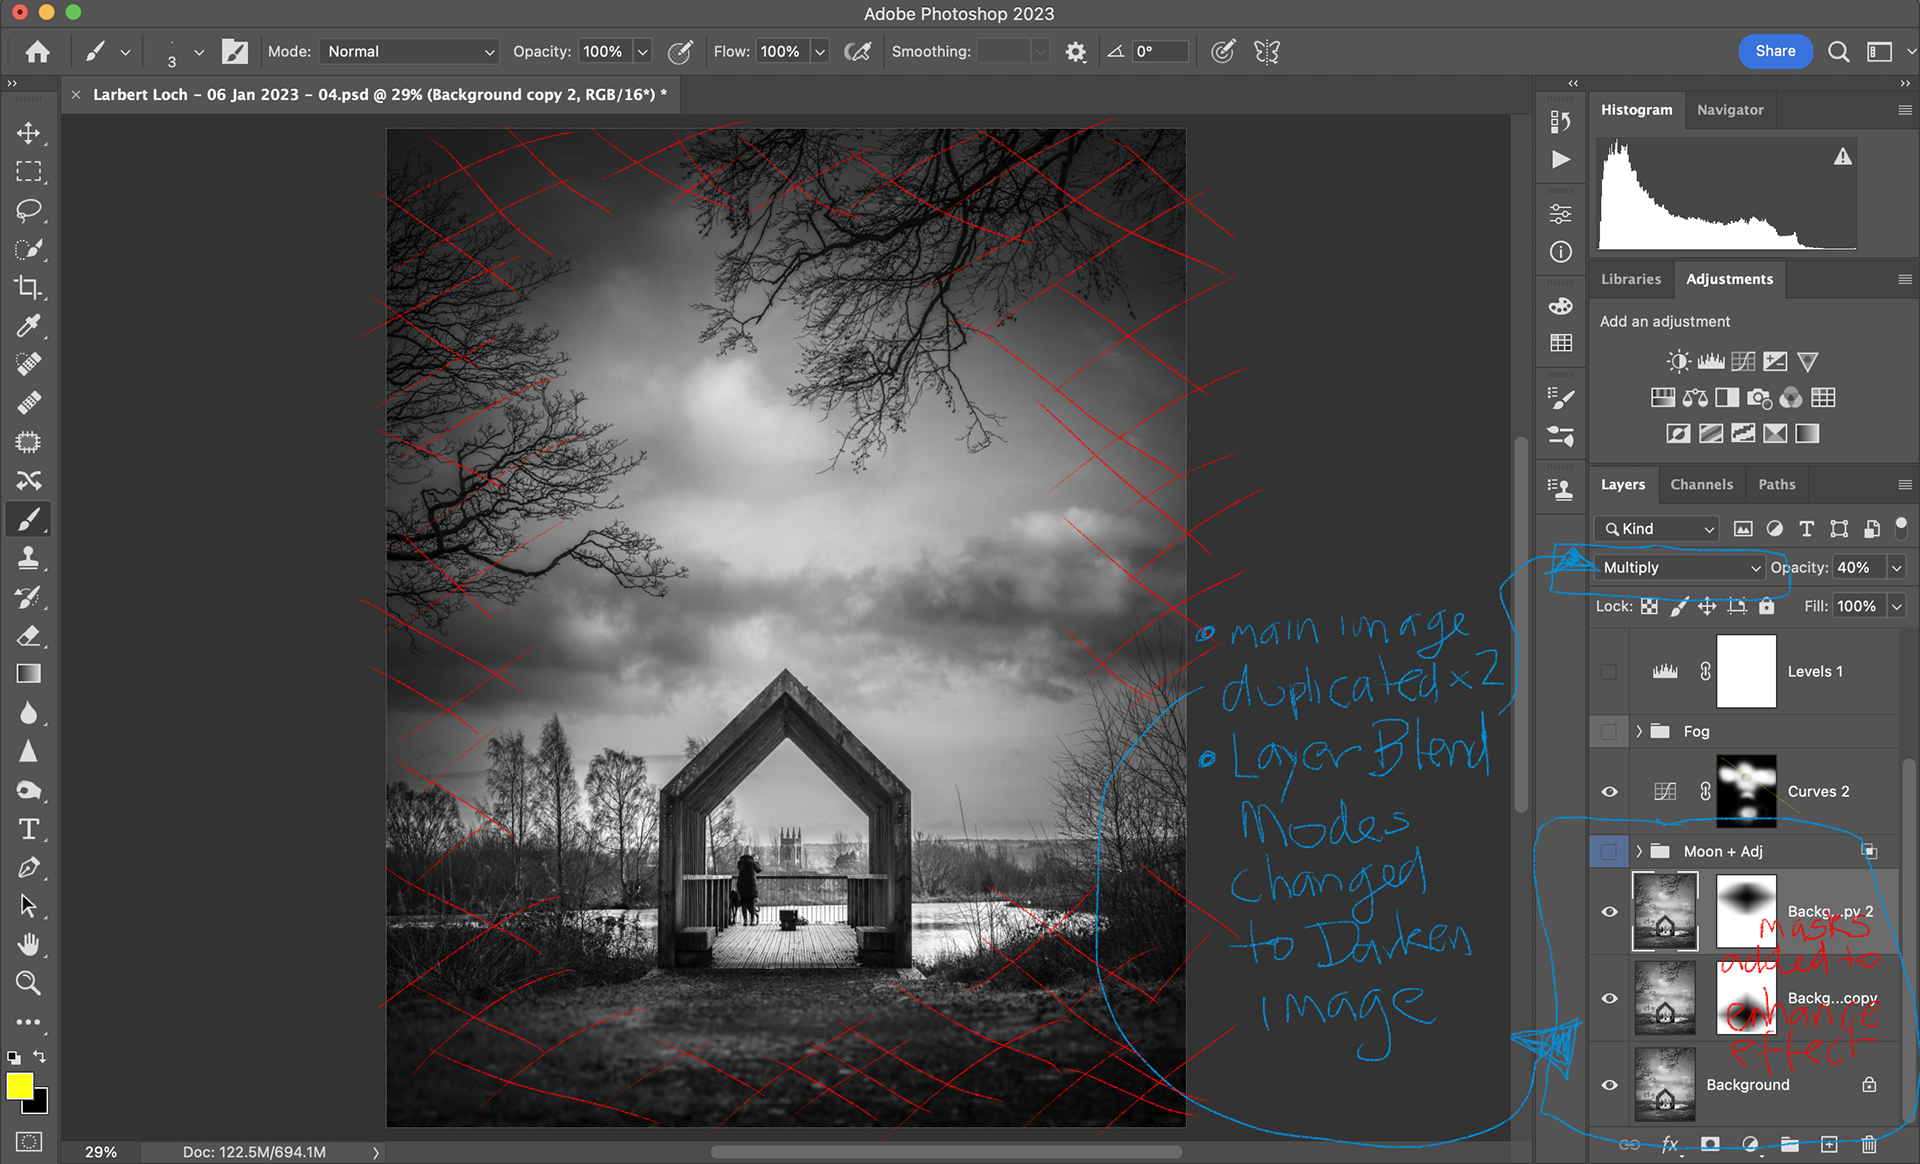
As the original shot was taken in daylight, I duplicated the Background a couple of times and used the Multiply layer blend mode to darken it all up - some masks used to keep the centre, where the moon would be glowing, a bit brighter.
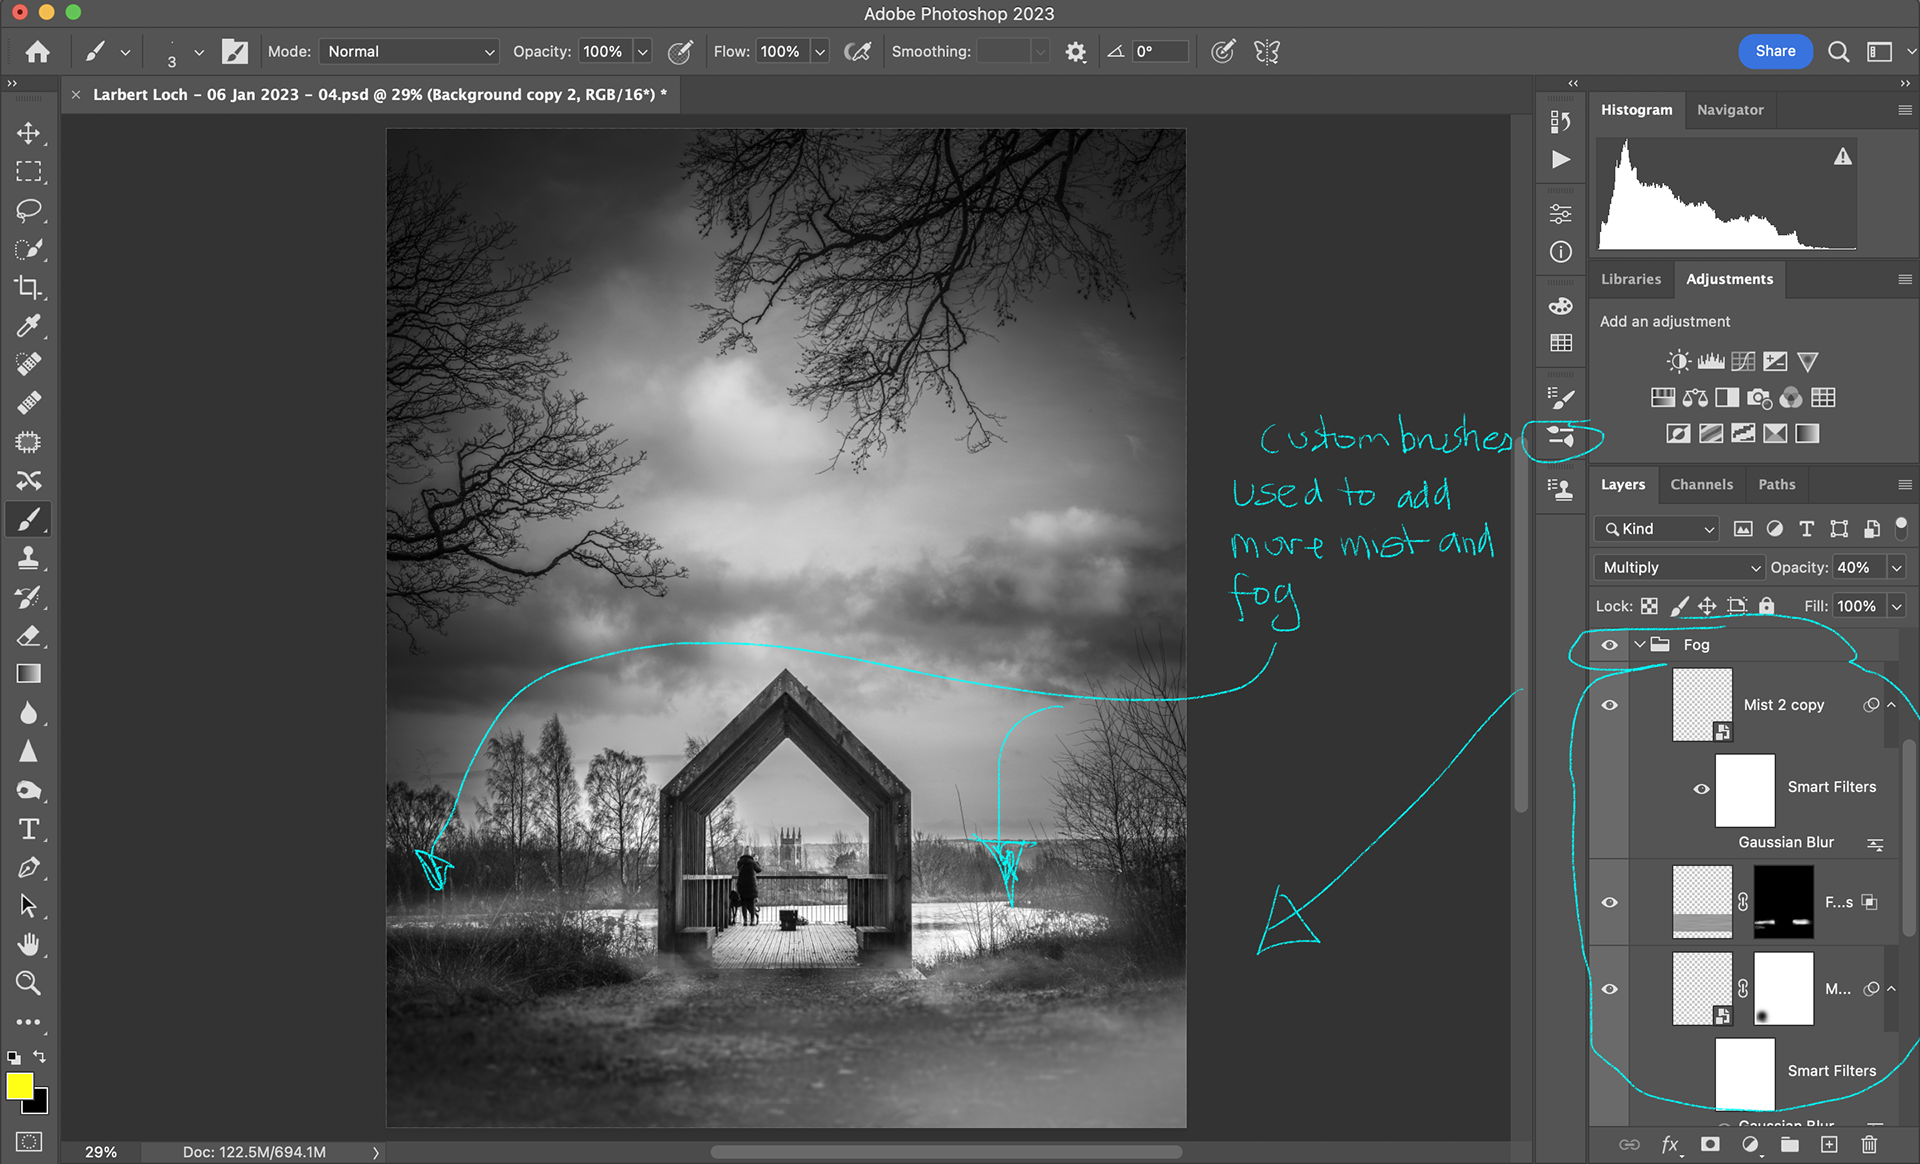
Grabbed my Wacom pen and some custom fog (and smoke) brushes and painted those into layers above the main pic. The Wacom tablet makes it much easier to work naturally with the brushes and masking techniques here and allows a much more analogue touch to the overall image - no sliders and numbers here, all touchy and feely.
I took a selection around the moon from the other image and moved it over to a new layer in the main document. Converted this to match the B&W of the background, and with some quick masking and a bit of more advanced layer blending this allowed the moon to be moved around the background and into position so that it would appear behind the clouds and branches. I have actually seen a few images (shared hundreds of times on social media) where there’s a big giant eff-off moon IN FRONT of the clouds! Go figure…
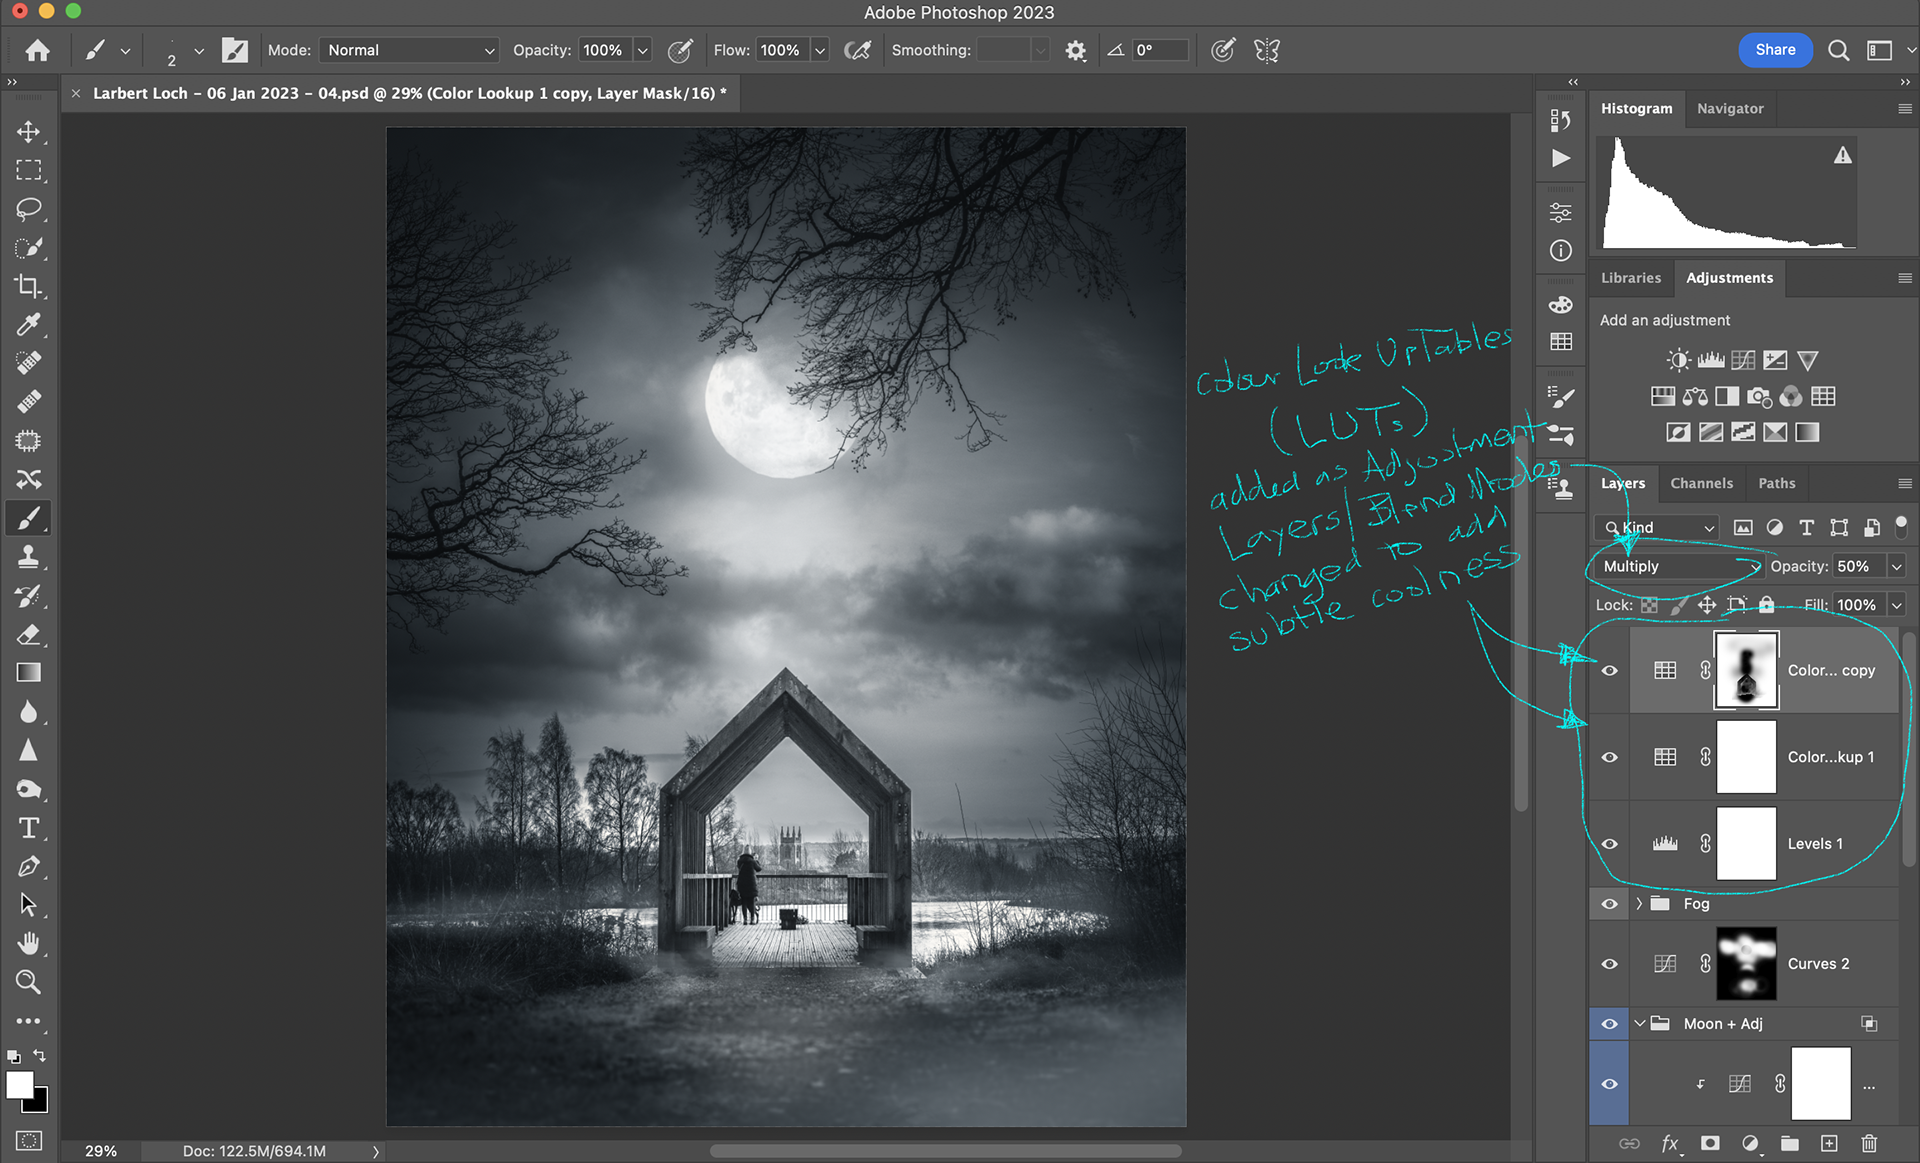
With everything pretty much in place, I added some Colour Lookup Up Tables (LUTs) to add some subtle colour and toning, before heading back to LR.
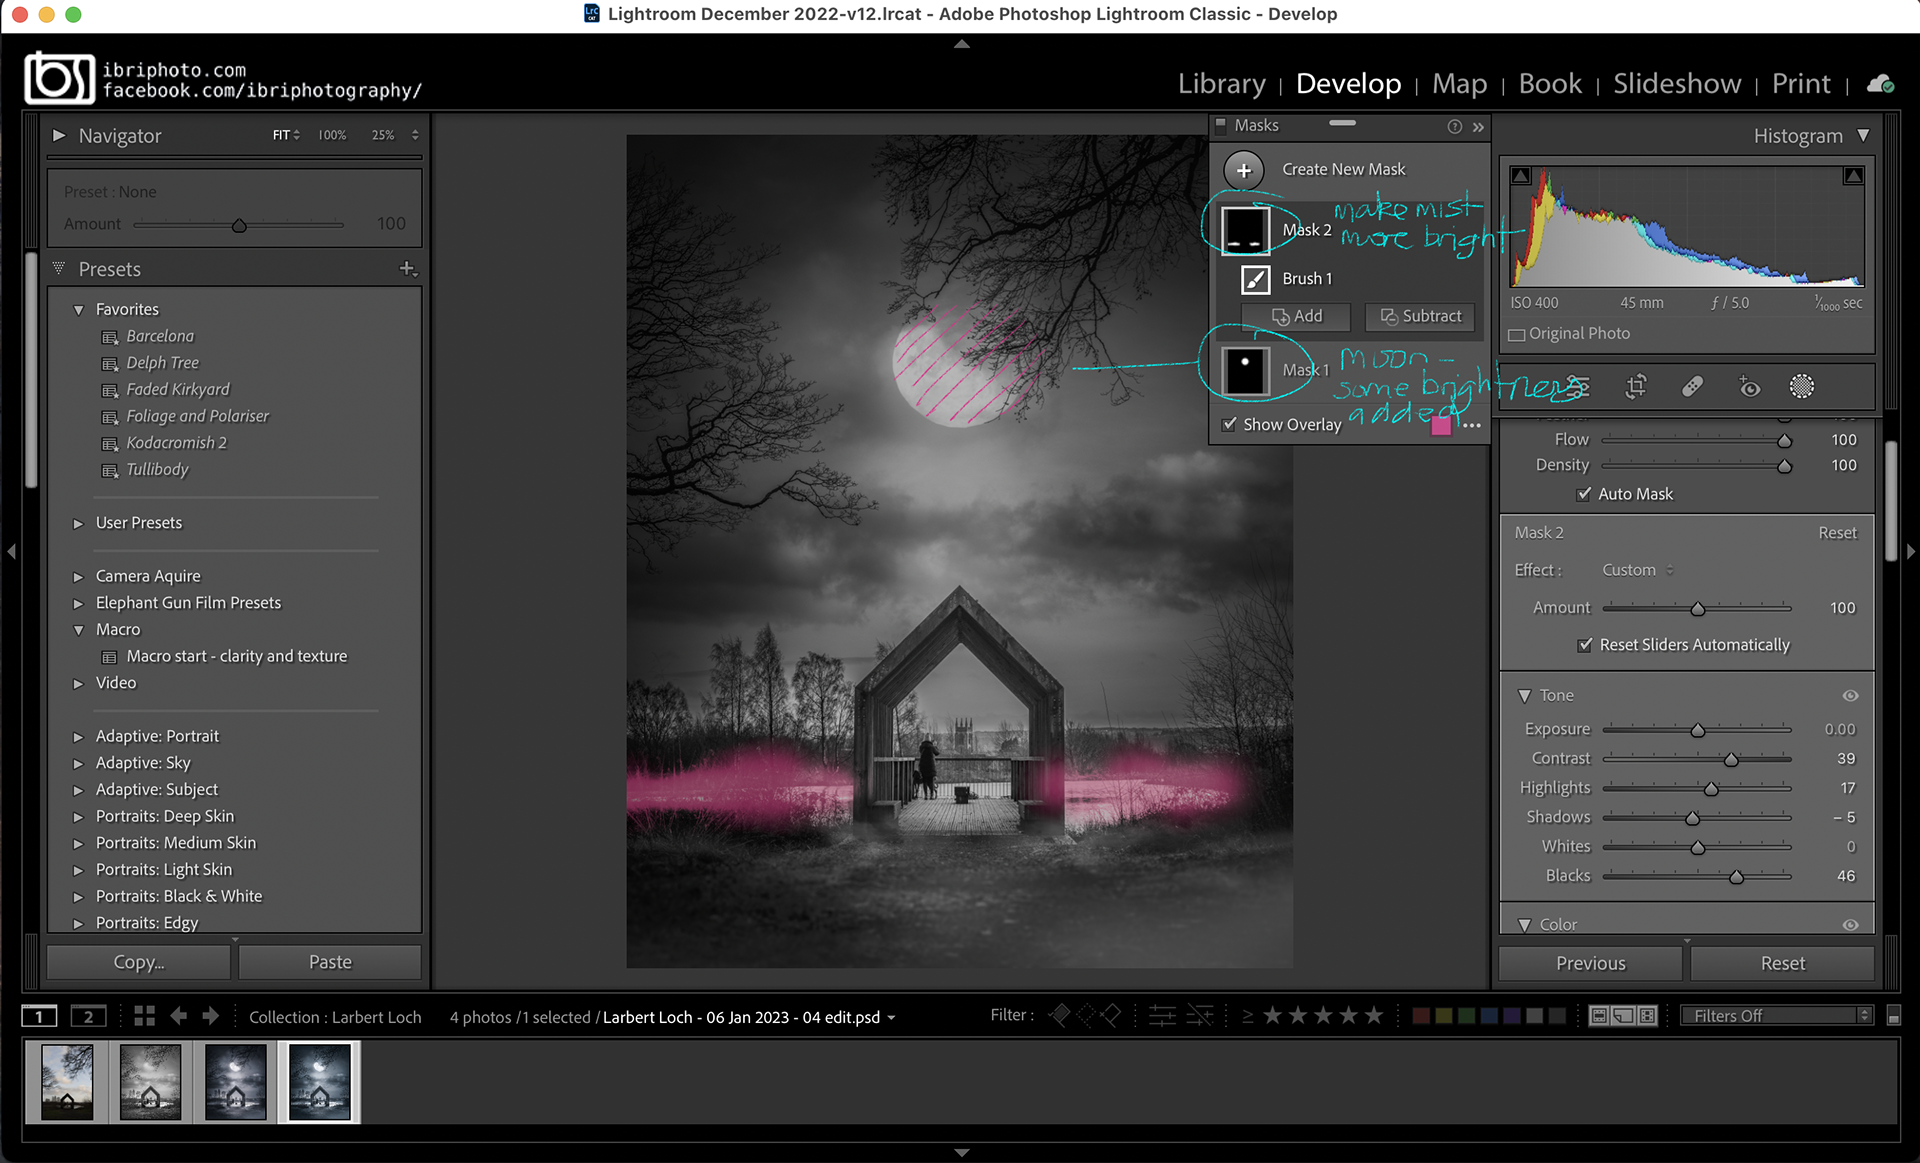
I tweaked some smaller areas here with toning and clarity, using the much improved Masks feature in LR - brightening the moon and the mist a bit.
Final minor touches to enhance colour and contrast and all’s good. And, because the multi-layered PS file is still being kept all neat and tidy in the LR catalogue, I can go back and make adjustments to all the elements at any point. Maybe even add a swan or two…

You may also like

Back to Top