I get as much enjoyment out of the post processing part of digital photography, spend as much time trying to keep up with the developments in the digital darkroom as with the cameras themselves. 
I think that with so many people out there taking photos nowadays, we all need some other strings to our bows to get noticed. 
So, this section on my site will cover a bit of that, and look under the bonnet at some of the pieces that I create.
15th January 2023
2023 continuing as 2022 ended, with endless days of darkness and dampness. Dreich as we say. Trip to the local DIY store to pick up a toilet seat replacement and usual procrastination stop to take photos delay to doing the DIY trying to capture how saturated the place is just now. Then an idea started to form...

After 40 days and 40 nights (feels like that anyhow), a gull returned with a branch from a fly-tipped Christmas tree and lo!, the floods had receded enough so that the local council skips could be accessed again (No ID, no rubbish dump) and the festive period flotsam and jetsam could be collected for land fill once more.

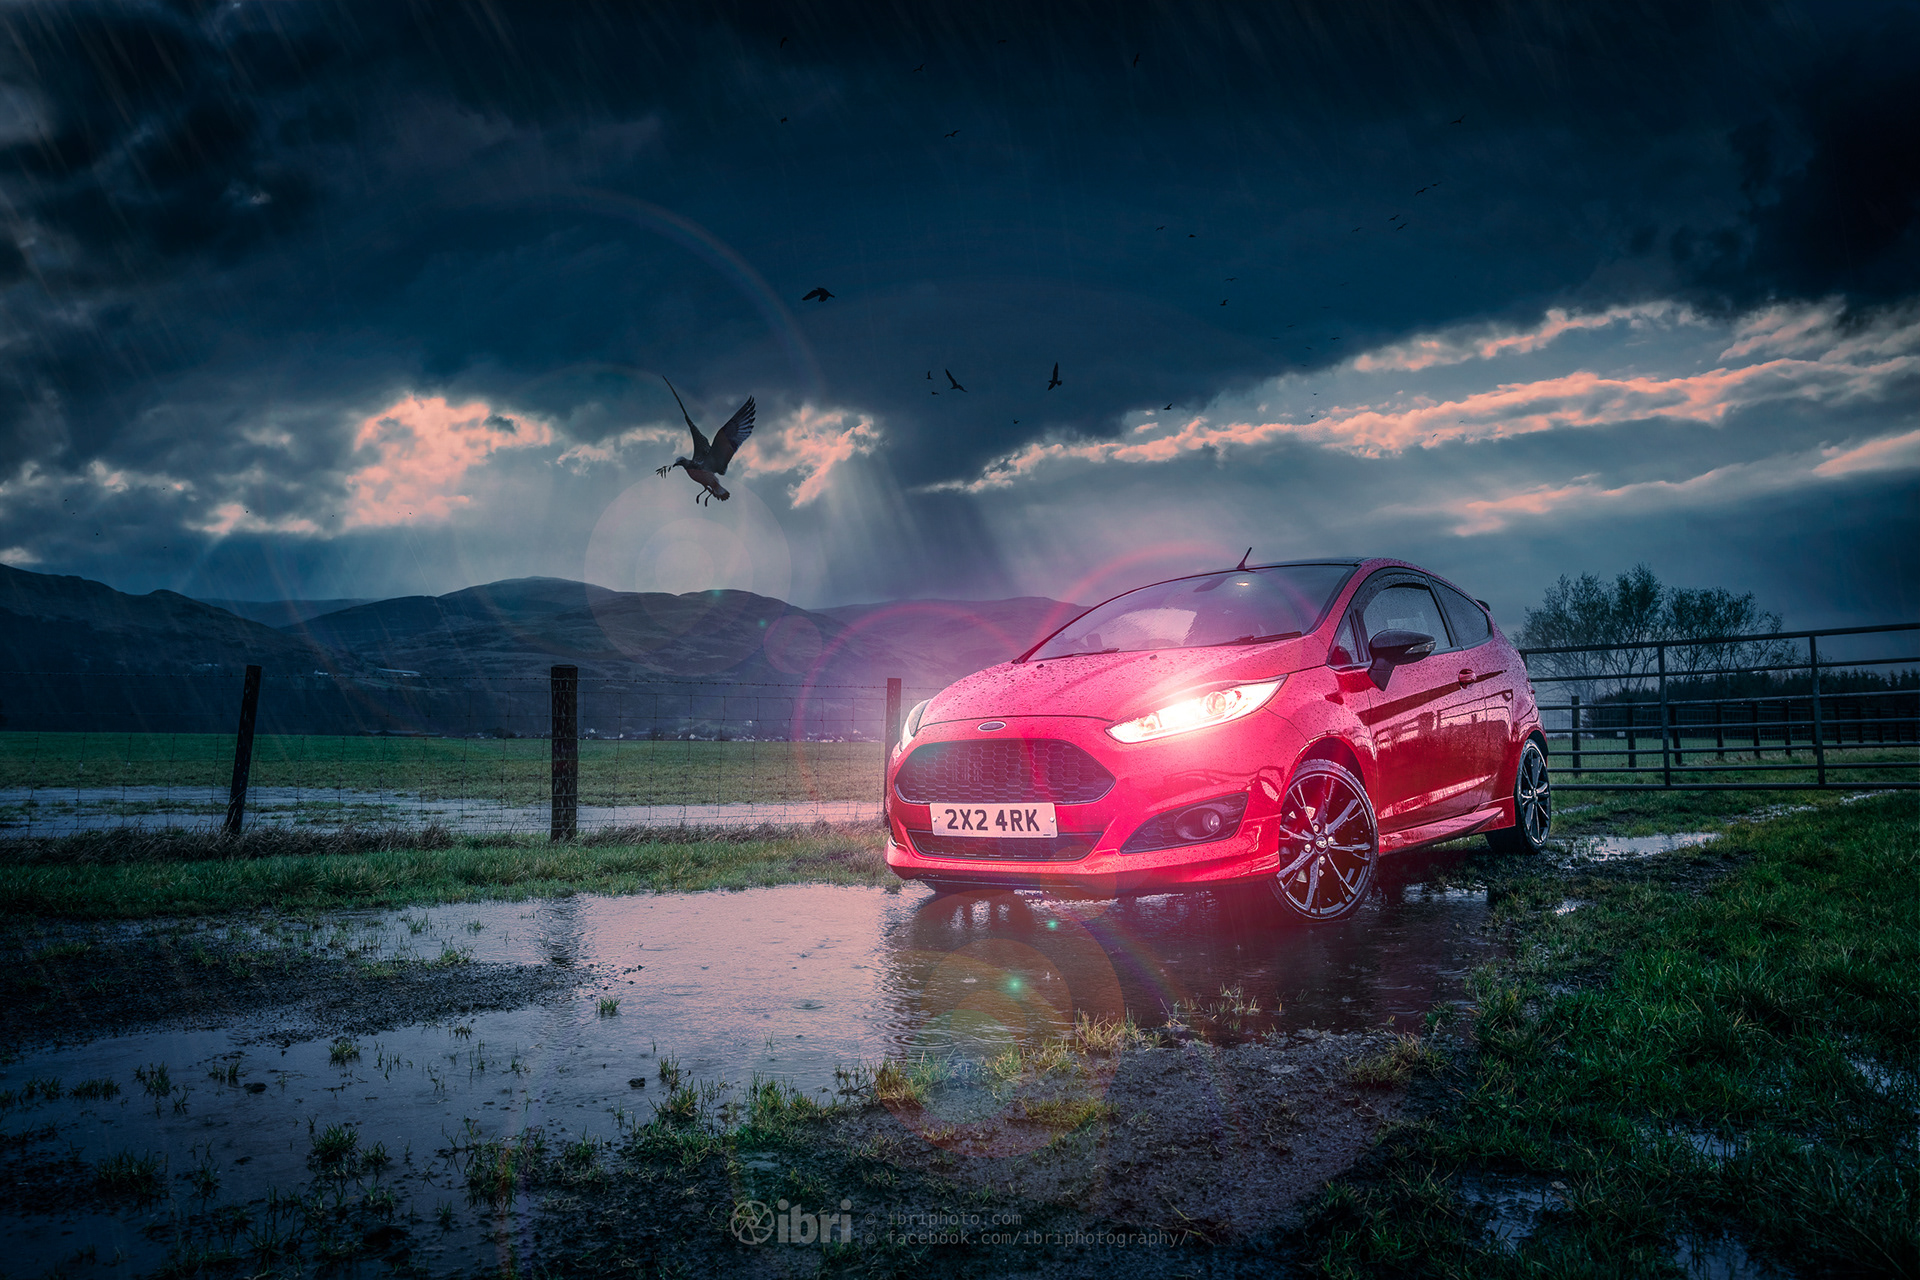
The final image above. My wee boy's Boy Racer wheels lending some much needed colour and Old Testament vibes added to reflect the biblical rain we've experienced.  
The images below show the creative process taken to get to the image above - with some scribblings and captions to cover and try to explain the steps taken.
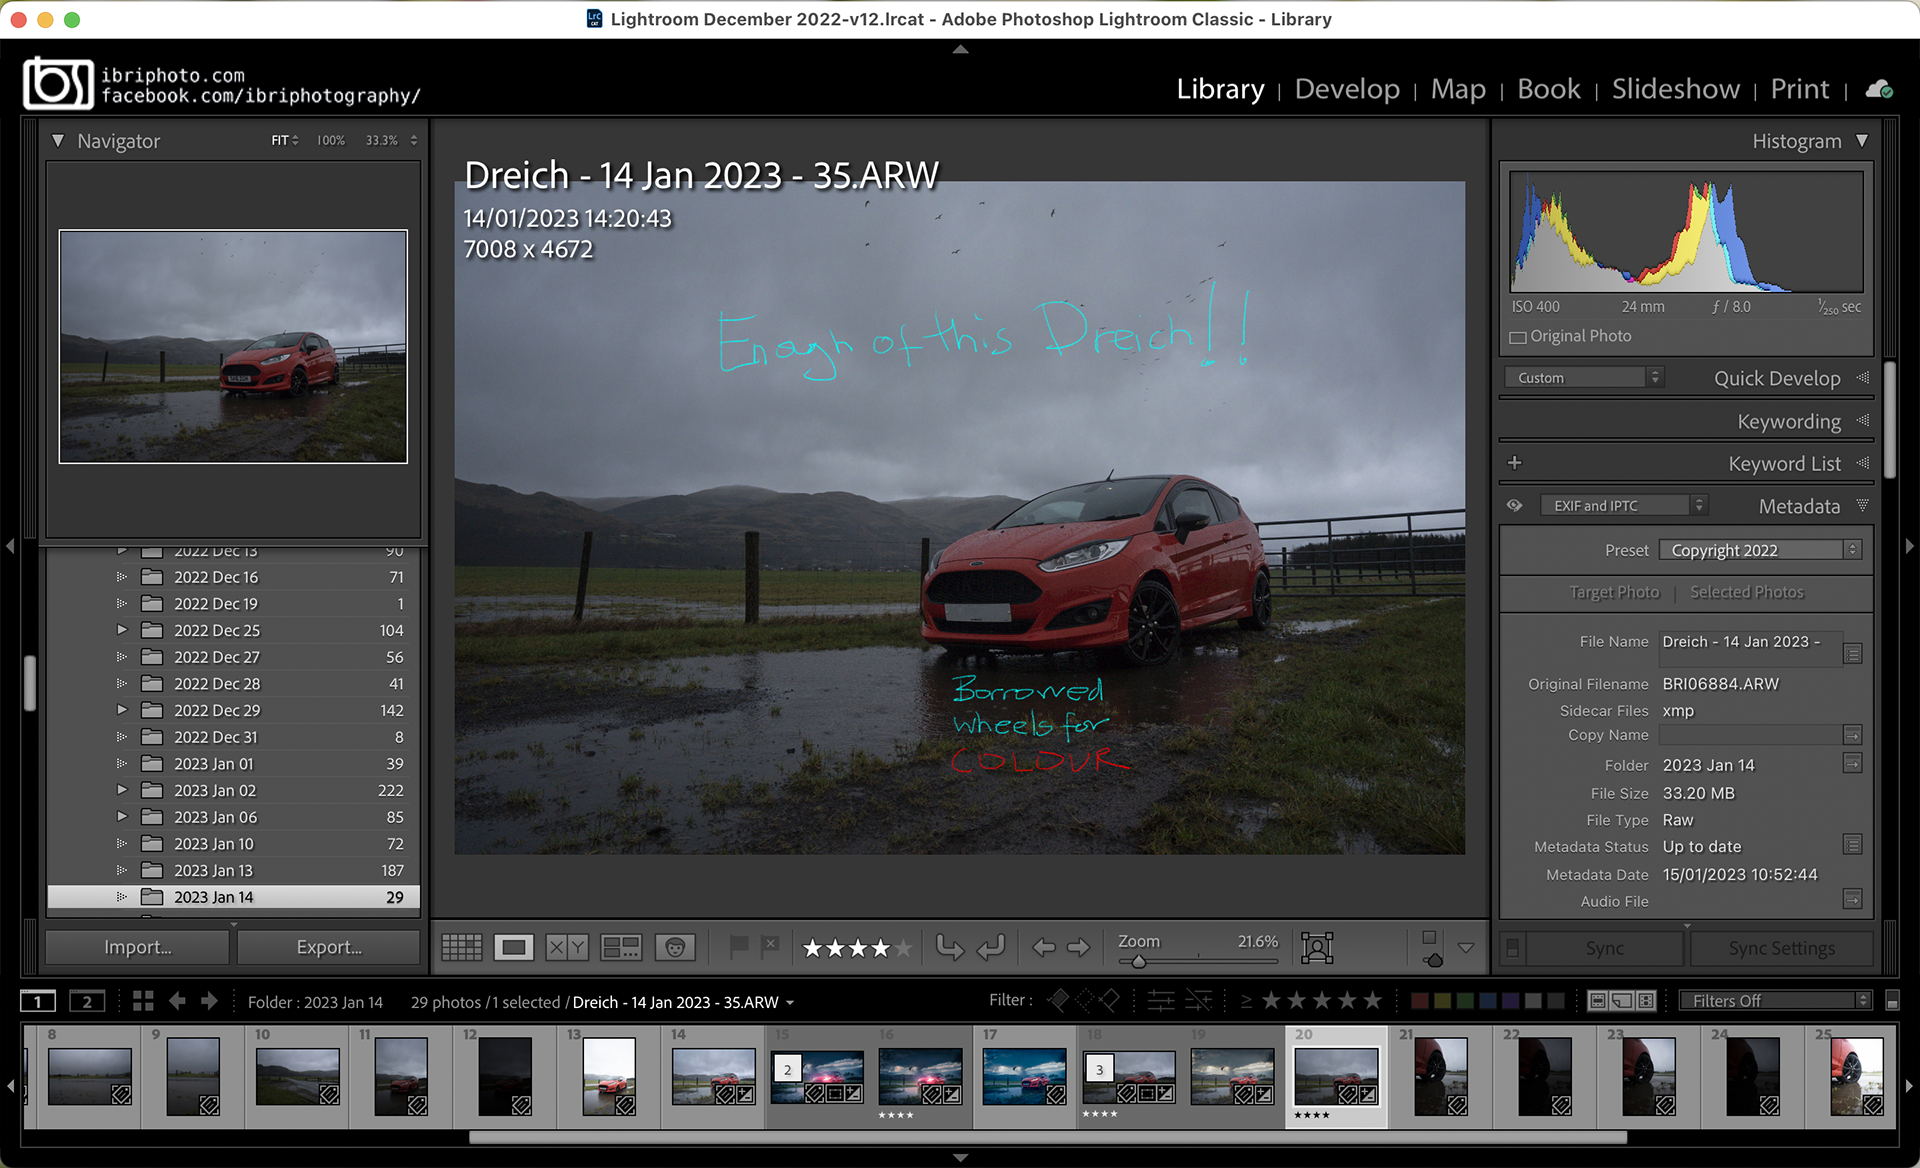
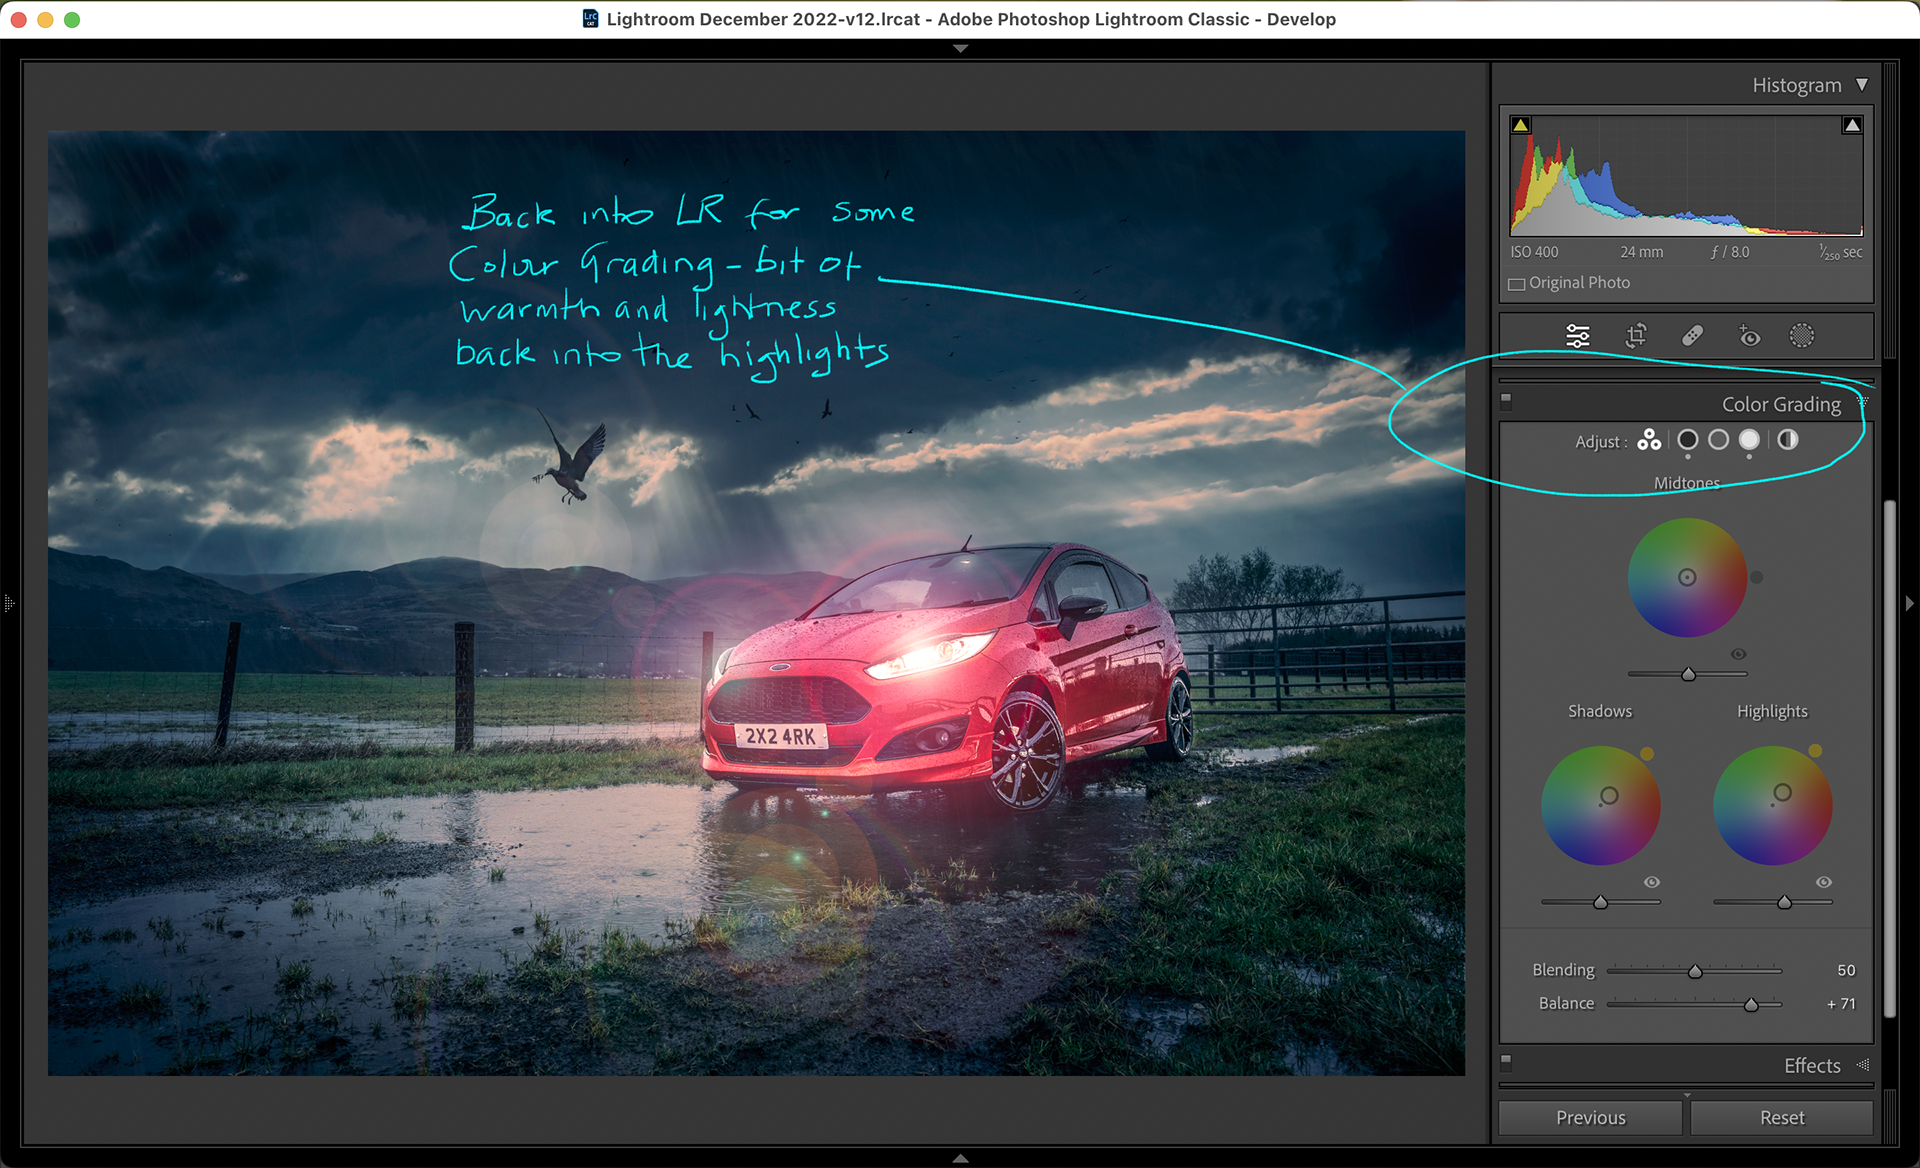
After drying off, importing and organising all the RAW shots into Lightroom (LR), a suitable flat, grey image was selected and edited to improve the global look of the photo. This one was beyond anything LR could do on its own.
I’d kept the exposure purposely dark so that any detail in the clouds could be enhanced, but after editing it in both LR and PS it still looked flat. The passing birds were a timely intrusion though, so wanted to keep those, and likely add to them.
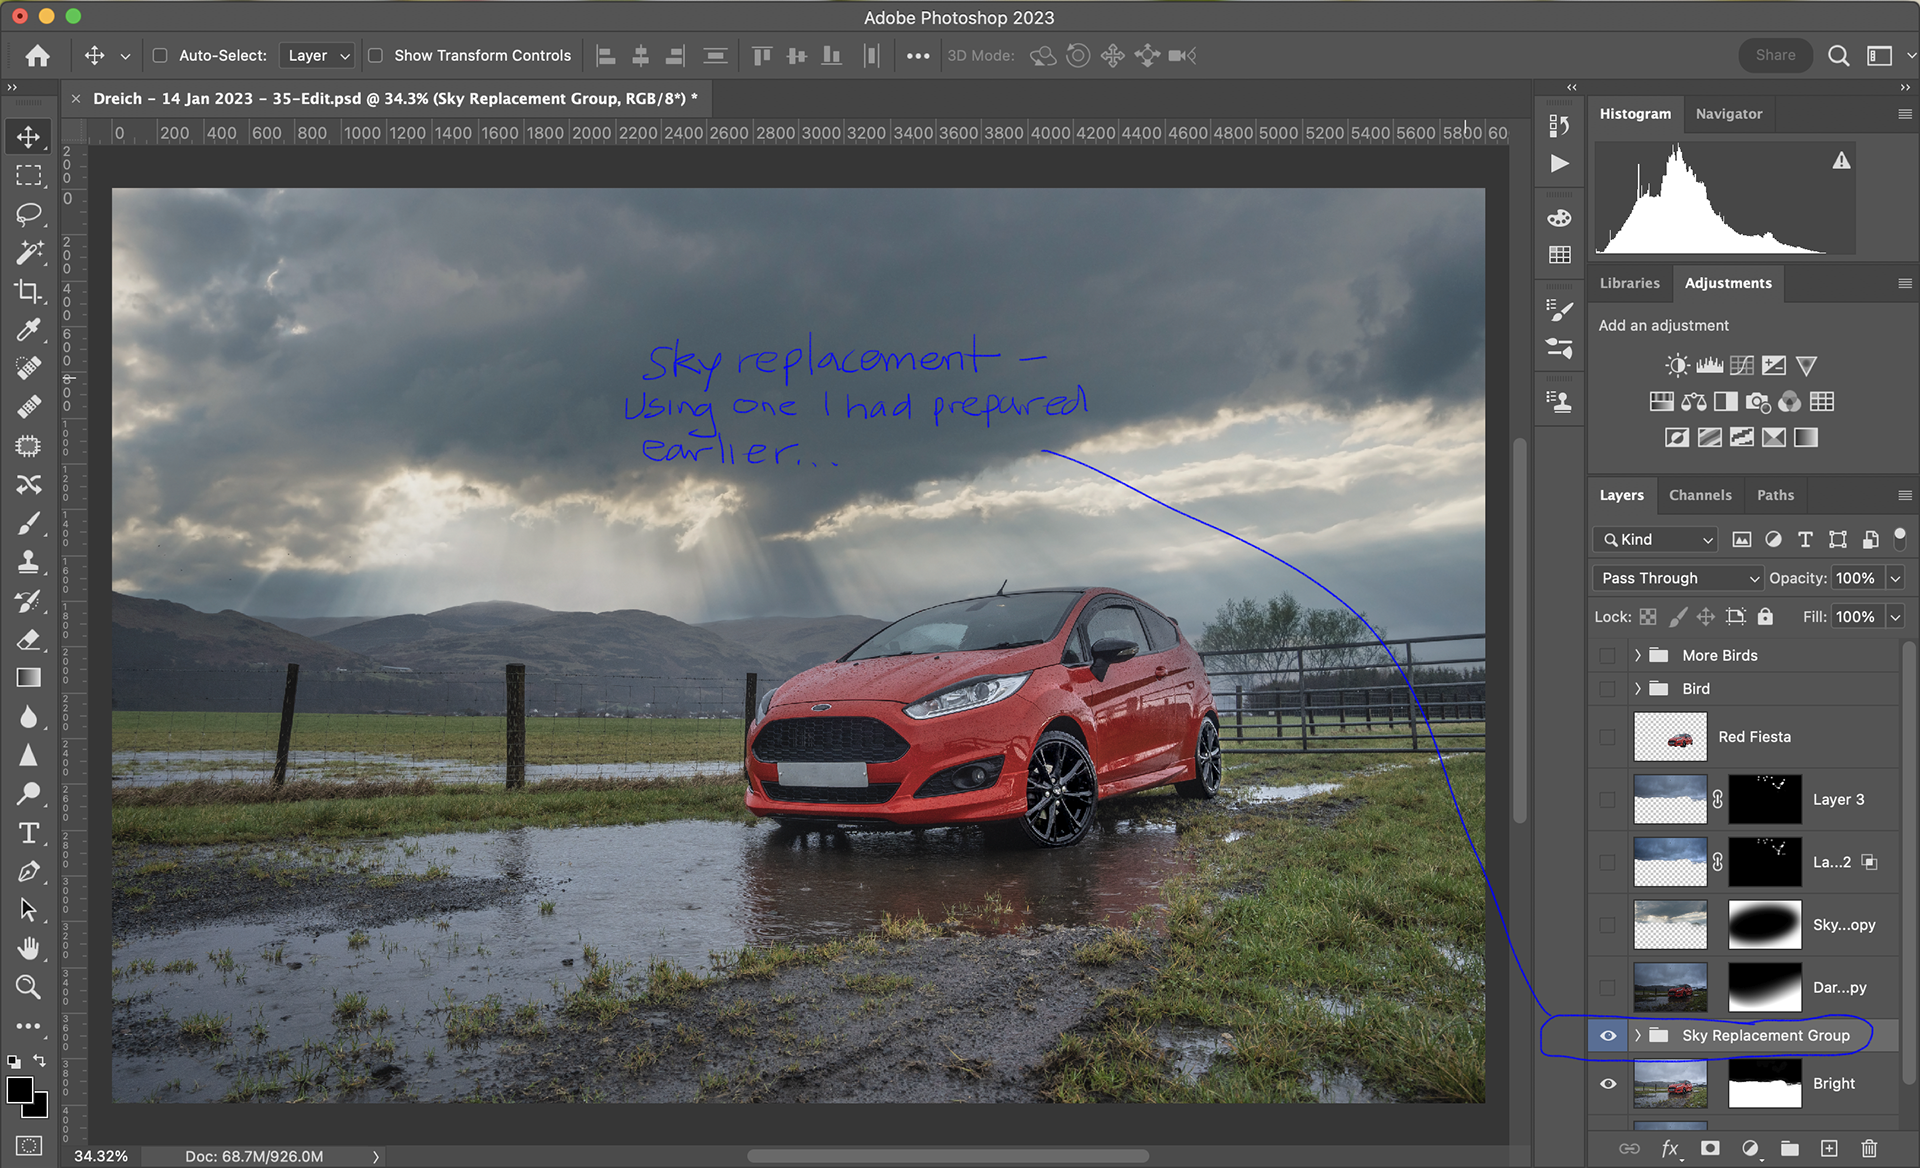
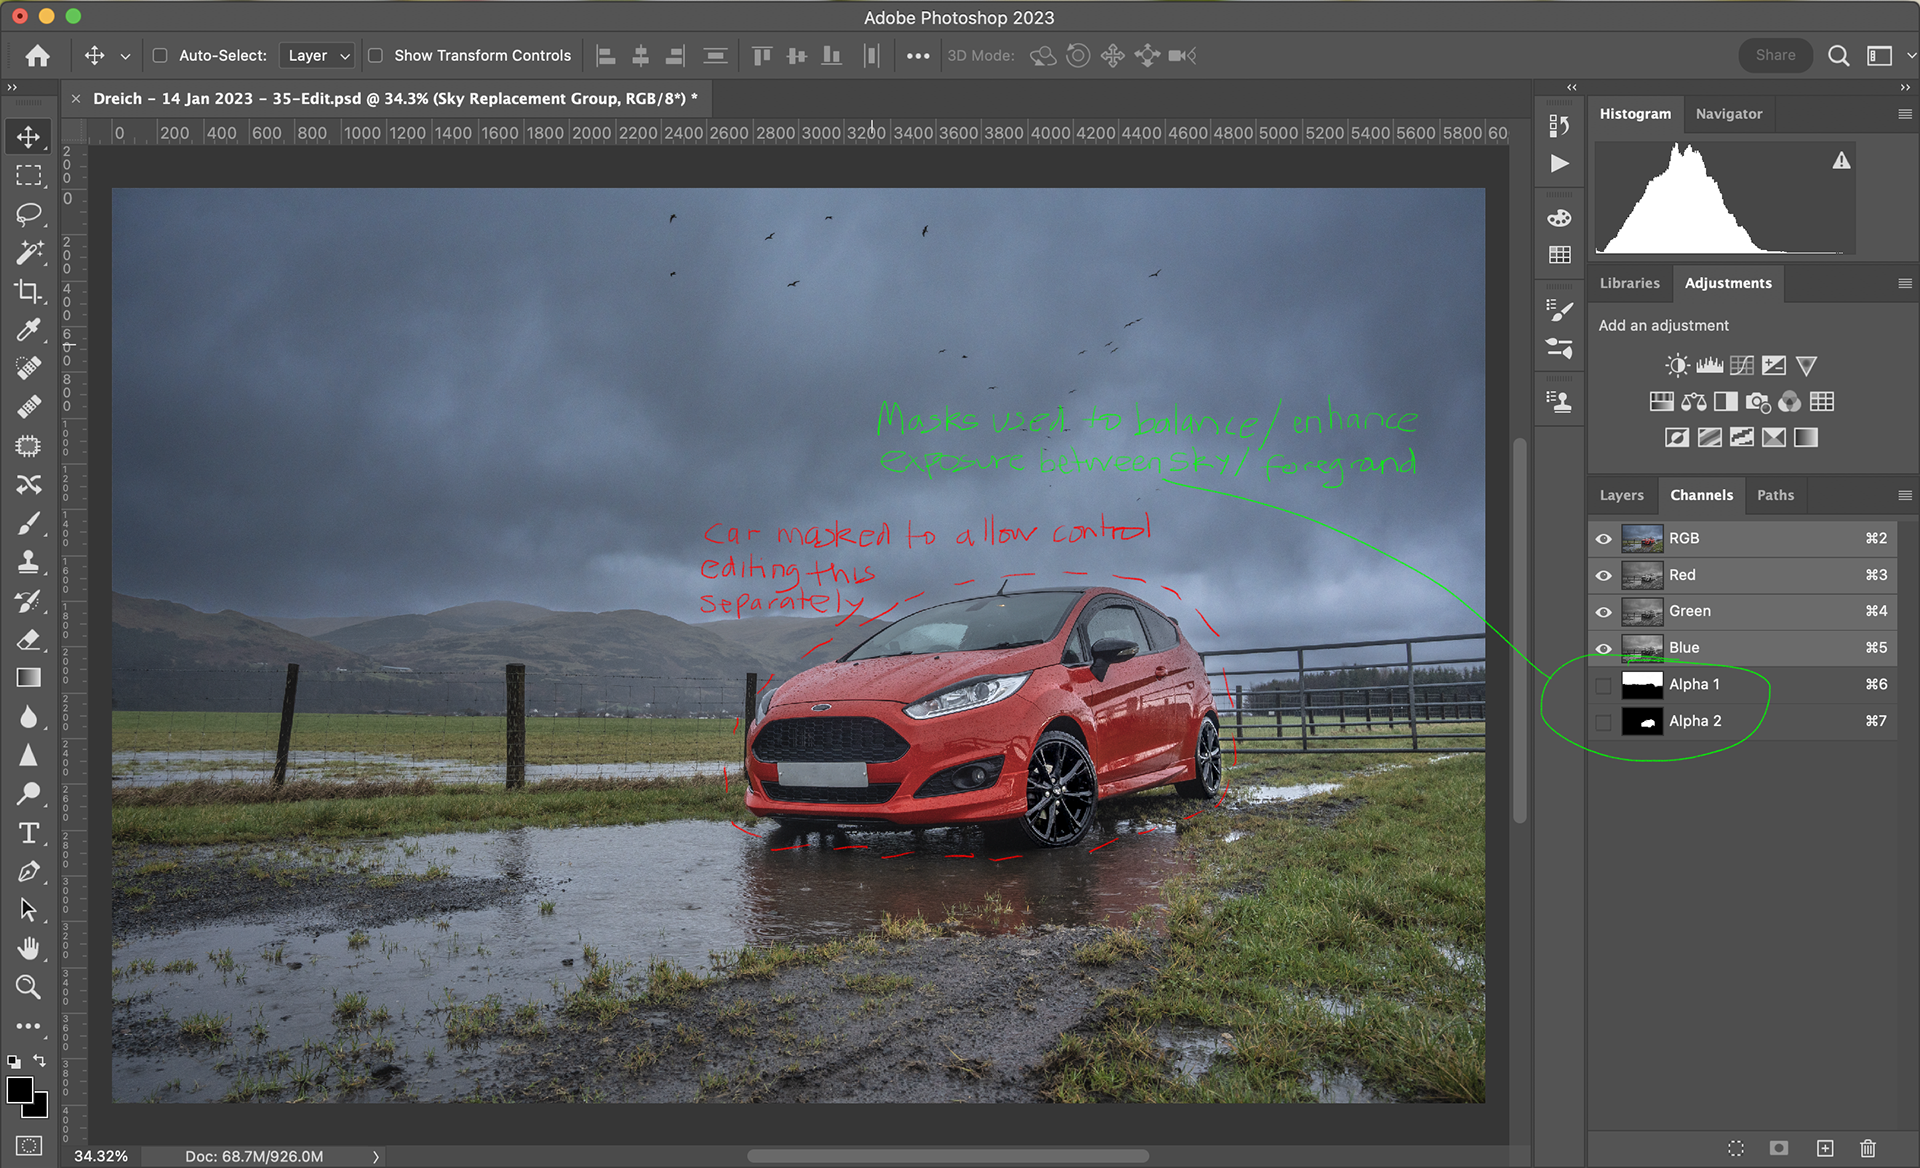
Photoshop’s ‘sky replacement’ tool brought in to use and a sky from the archives used to add some crepusculars (God’s fingers?). I could start to hear the heavenly choirs tuning up
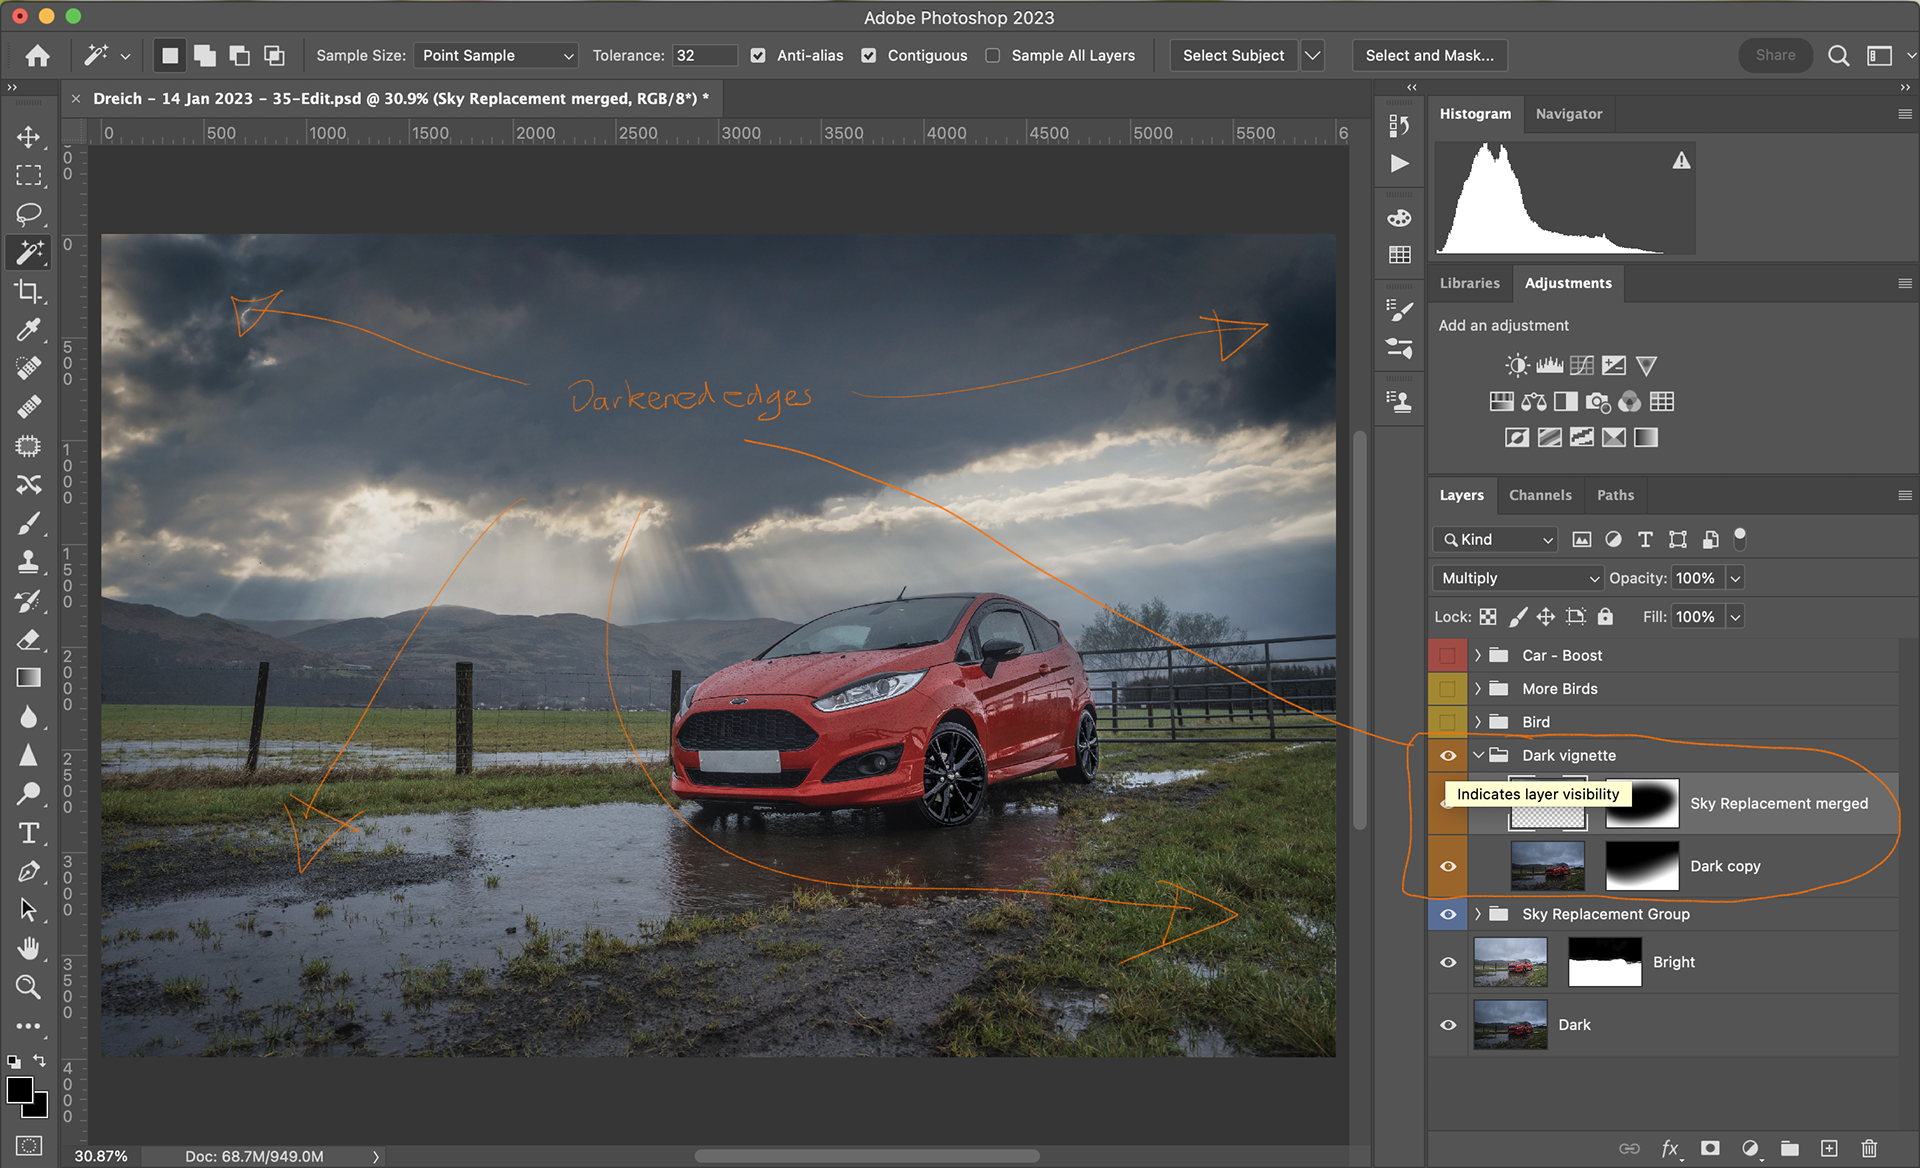
The sky replacement layers that had been created were merged and copied and some masking and Layer Blend mode changes added a brooding vignette around the edges of the image.
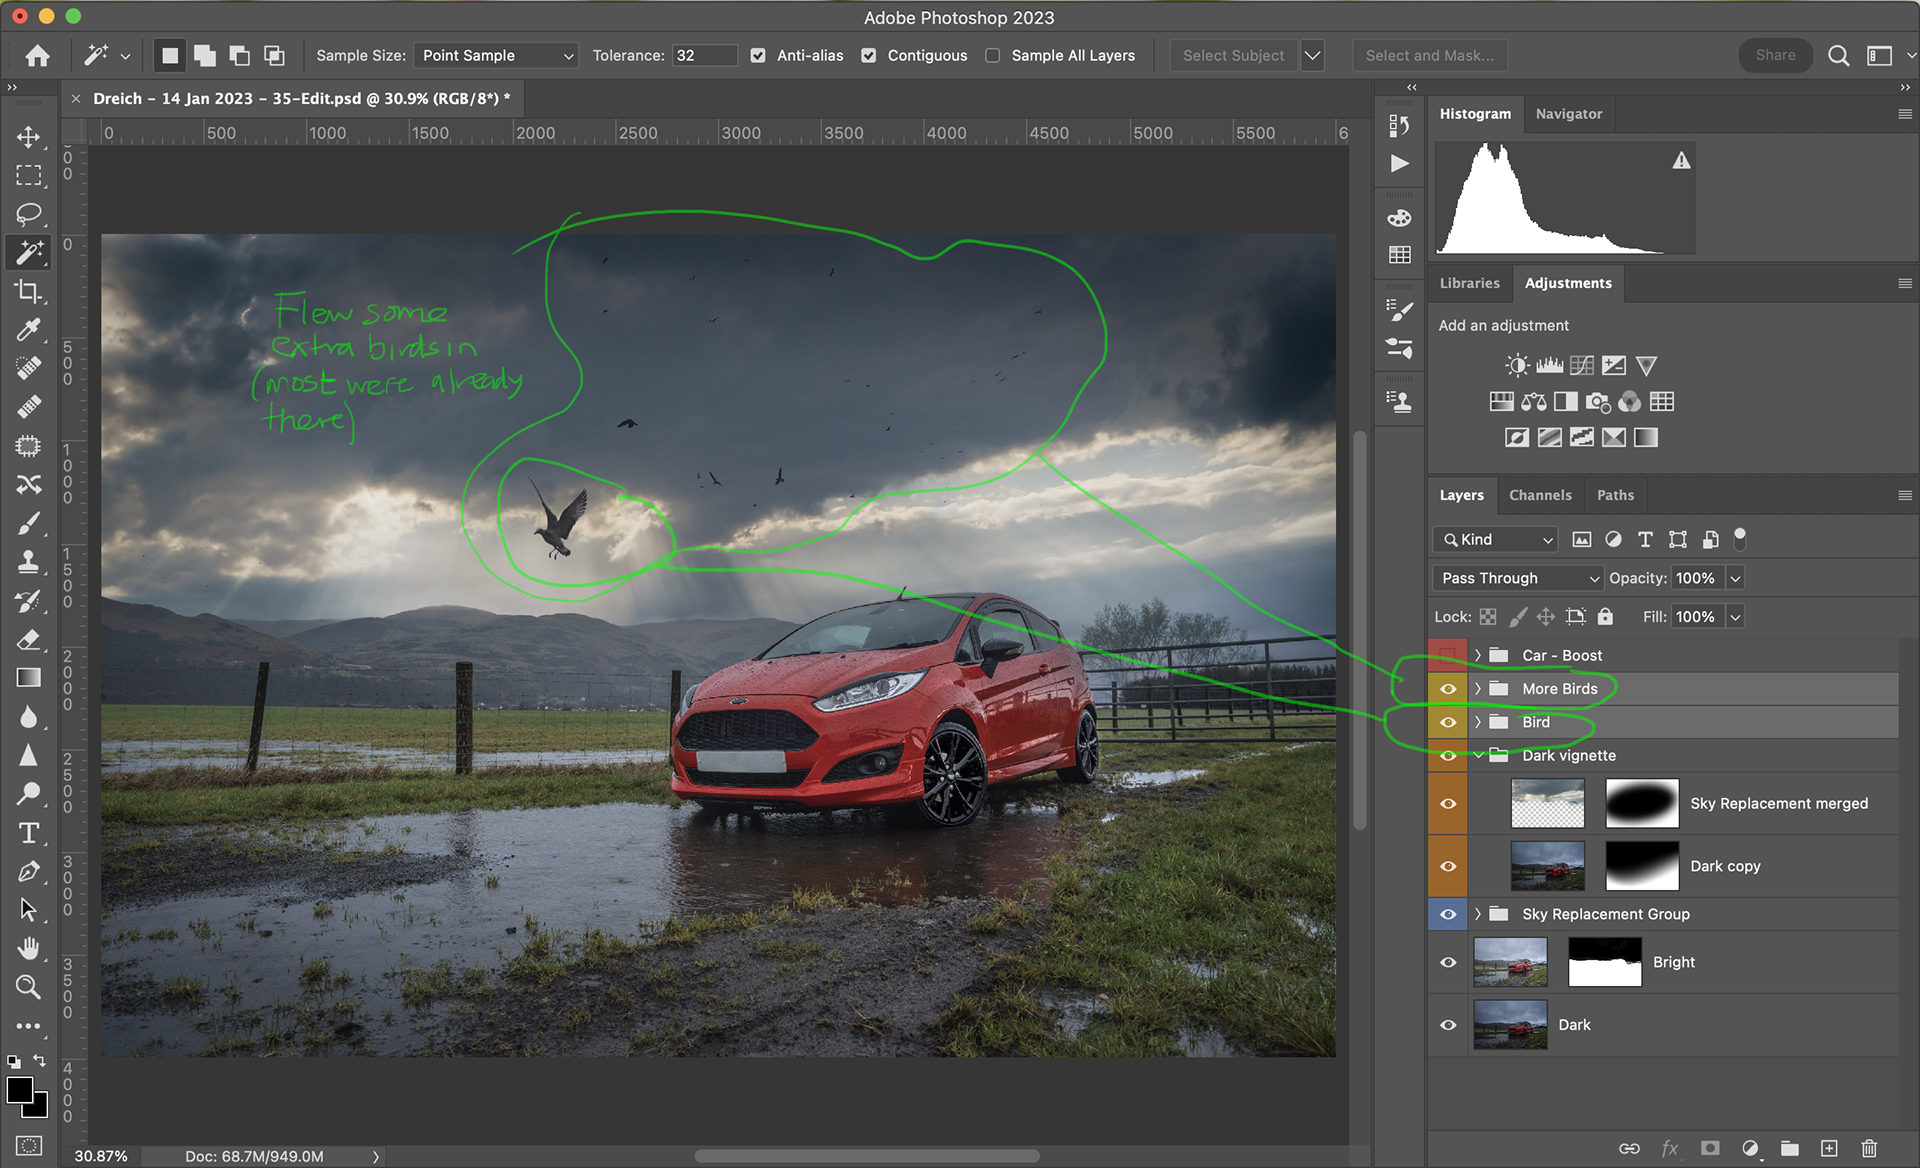
All the birds had gone by this point, but I copied them back from the original underlying layer and with some advanced layer blending got them back in. I didn’t have any photos of a Dove, so added one of a gull instead.
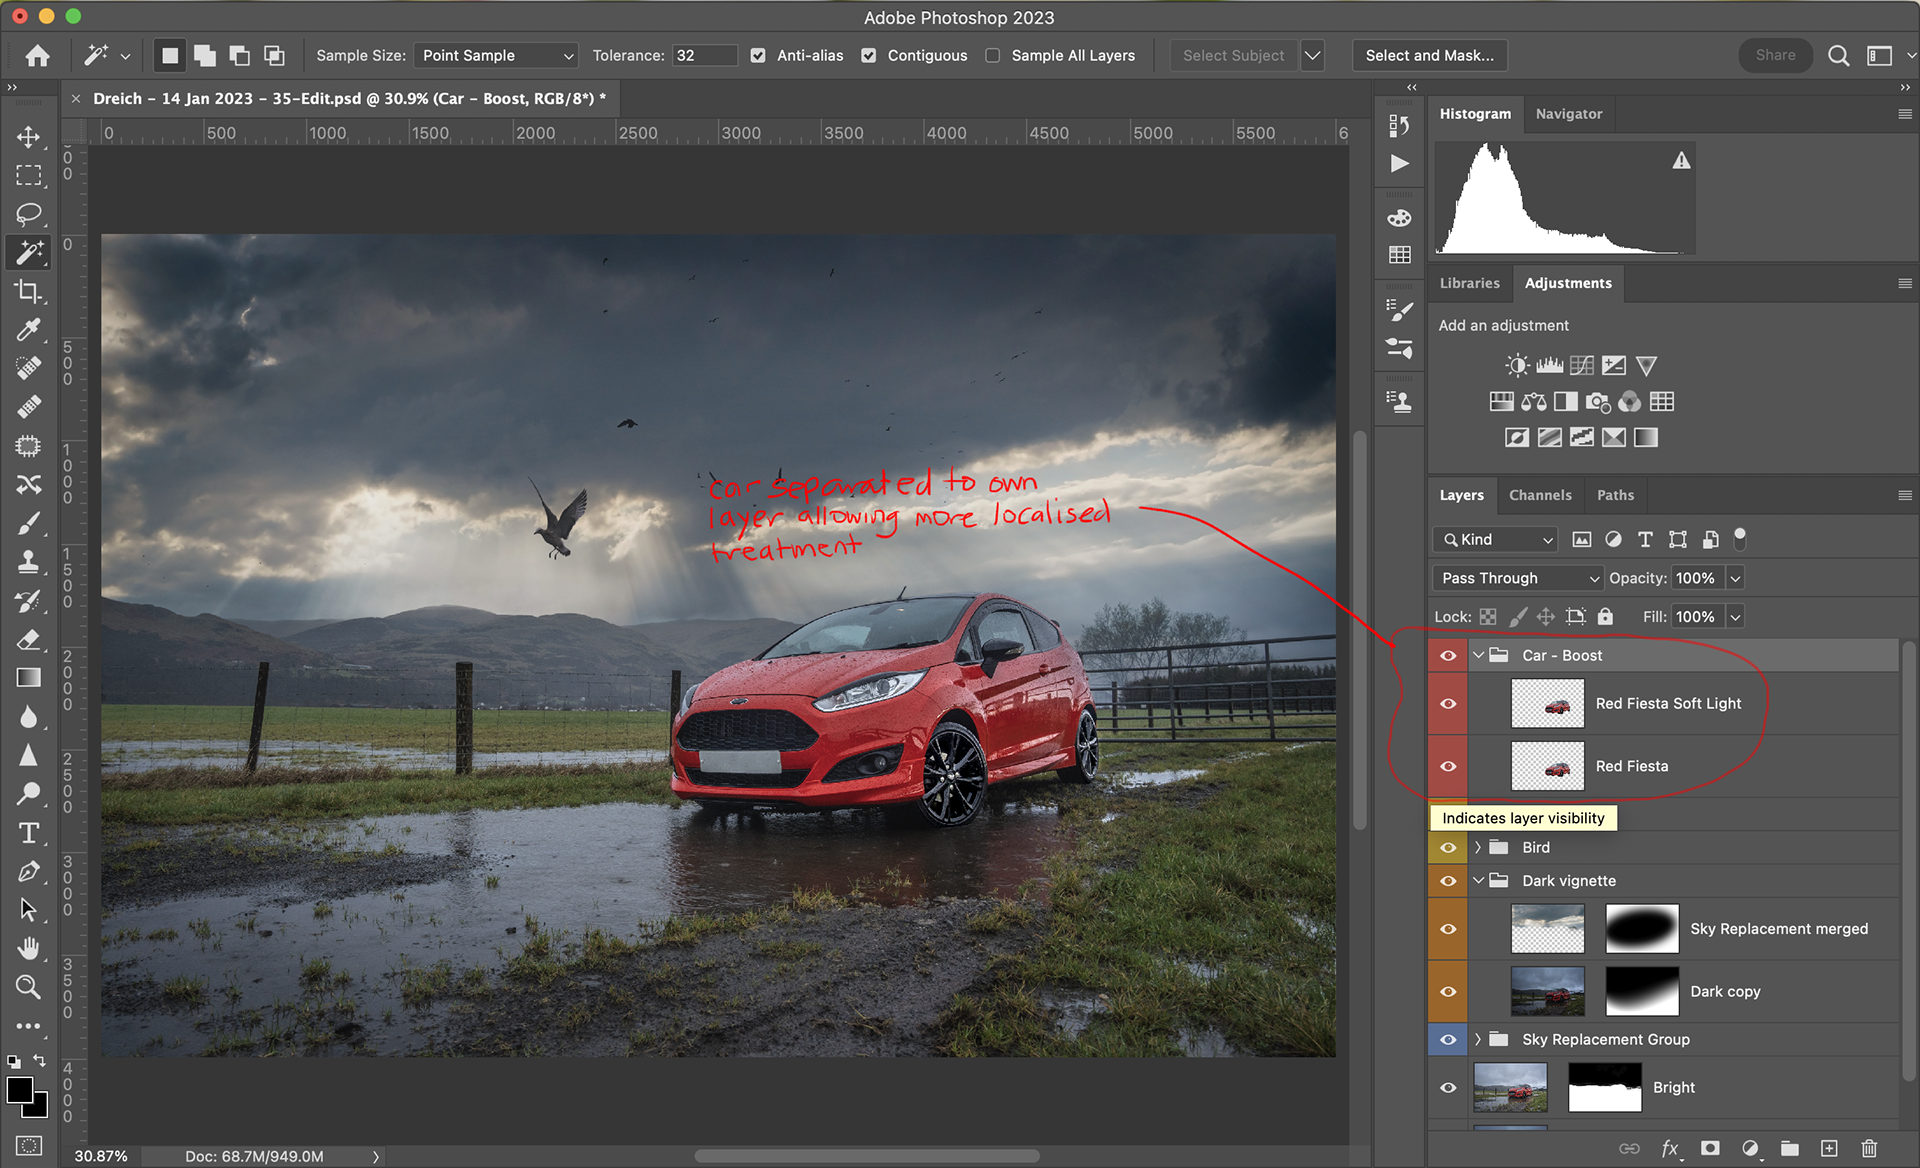
So the vehicle could be edited separately from the background elements, I cut this to its own layer so that some subtle pop could be applied
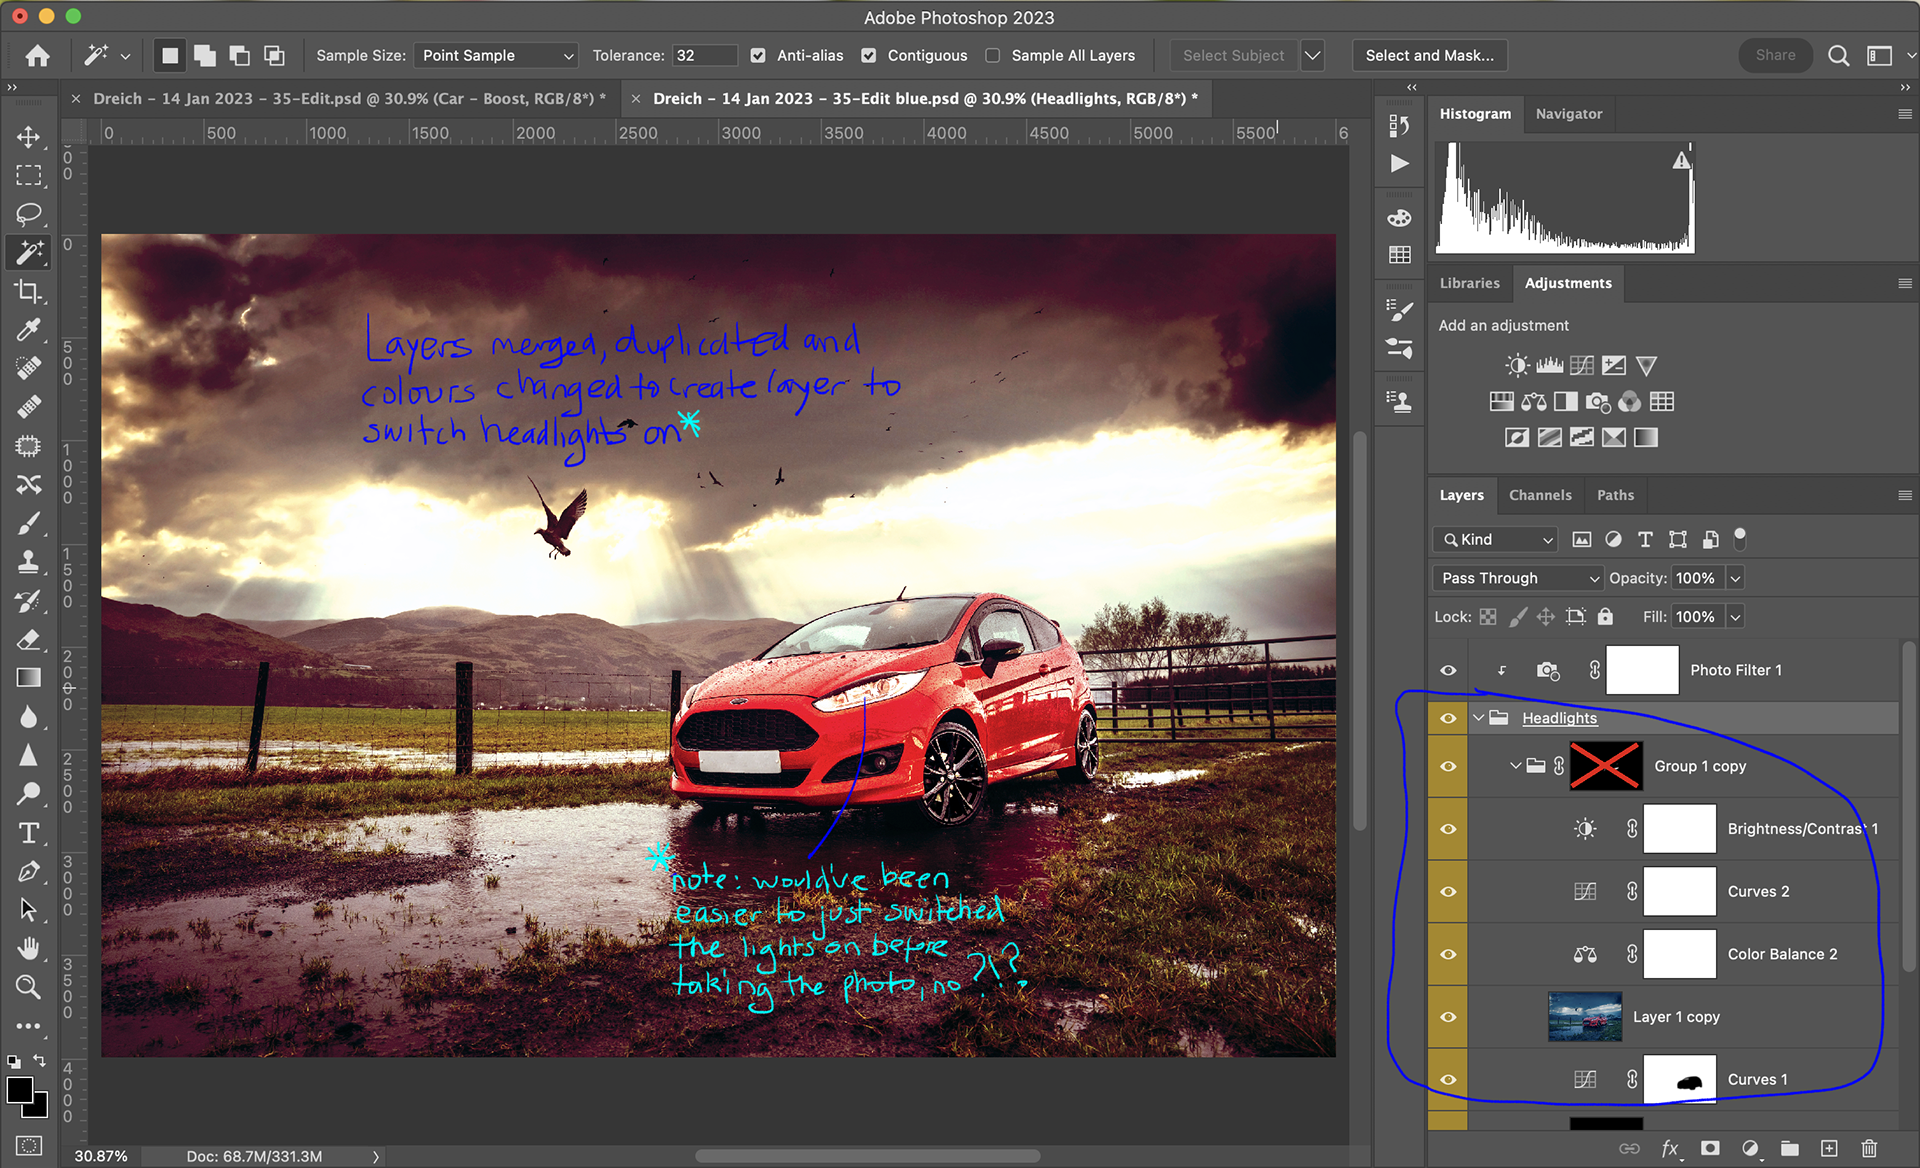
At this point the file was tipping over 1GB in size, so, being happy with how it was looking, duplicated it and merged it all into one layer to work with further. Made duplicate of the flattened layer and with a range of adjustment layers bumped everything up for brightness and warmth - focusing on how the lights looked.
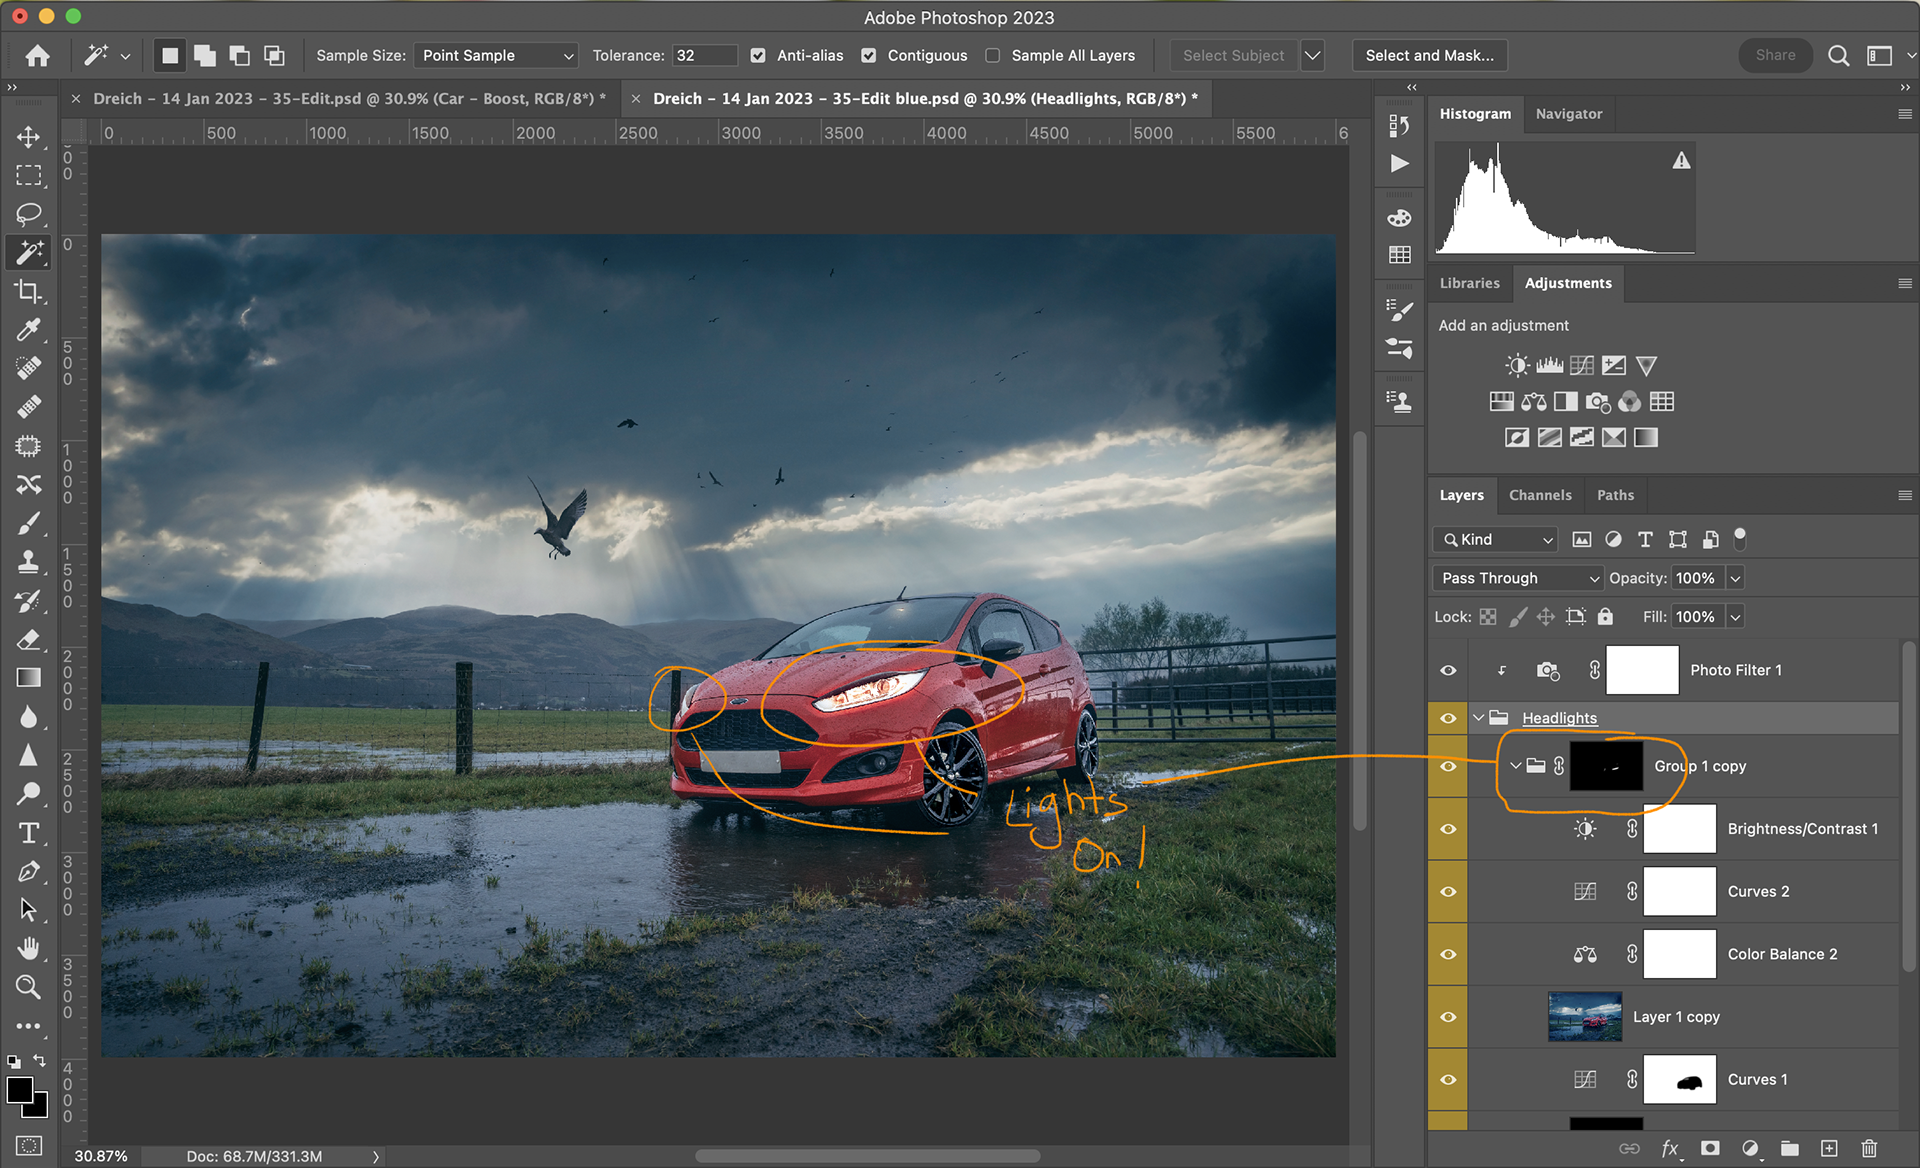
Masked off most of the warmed and brightened layer and left it showing only over the layers so that the headlights looked more like they were on at this time. Saved the car battery.
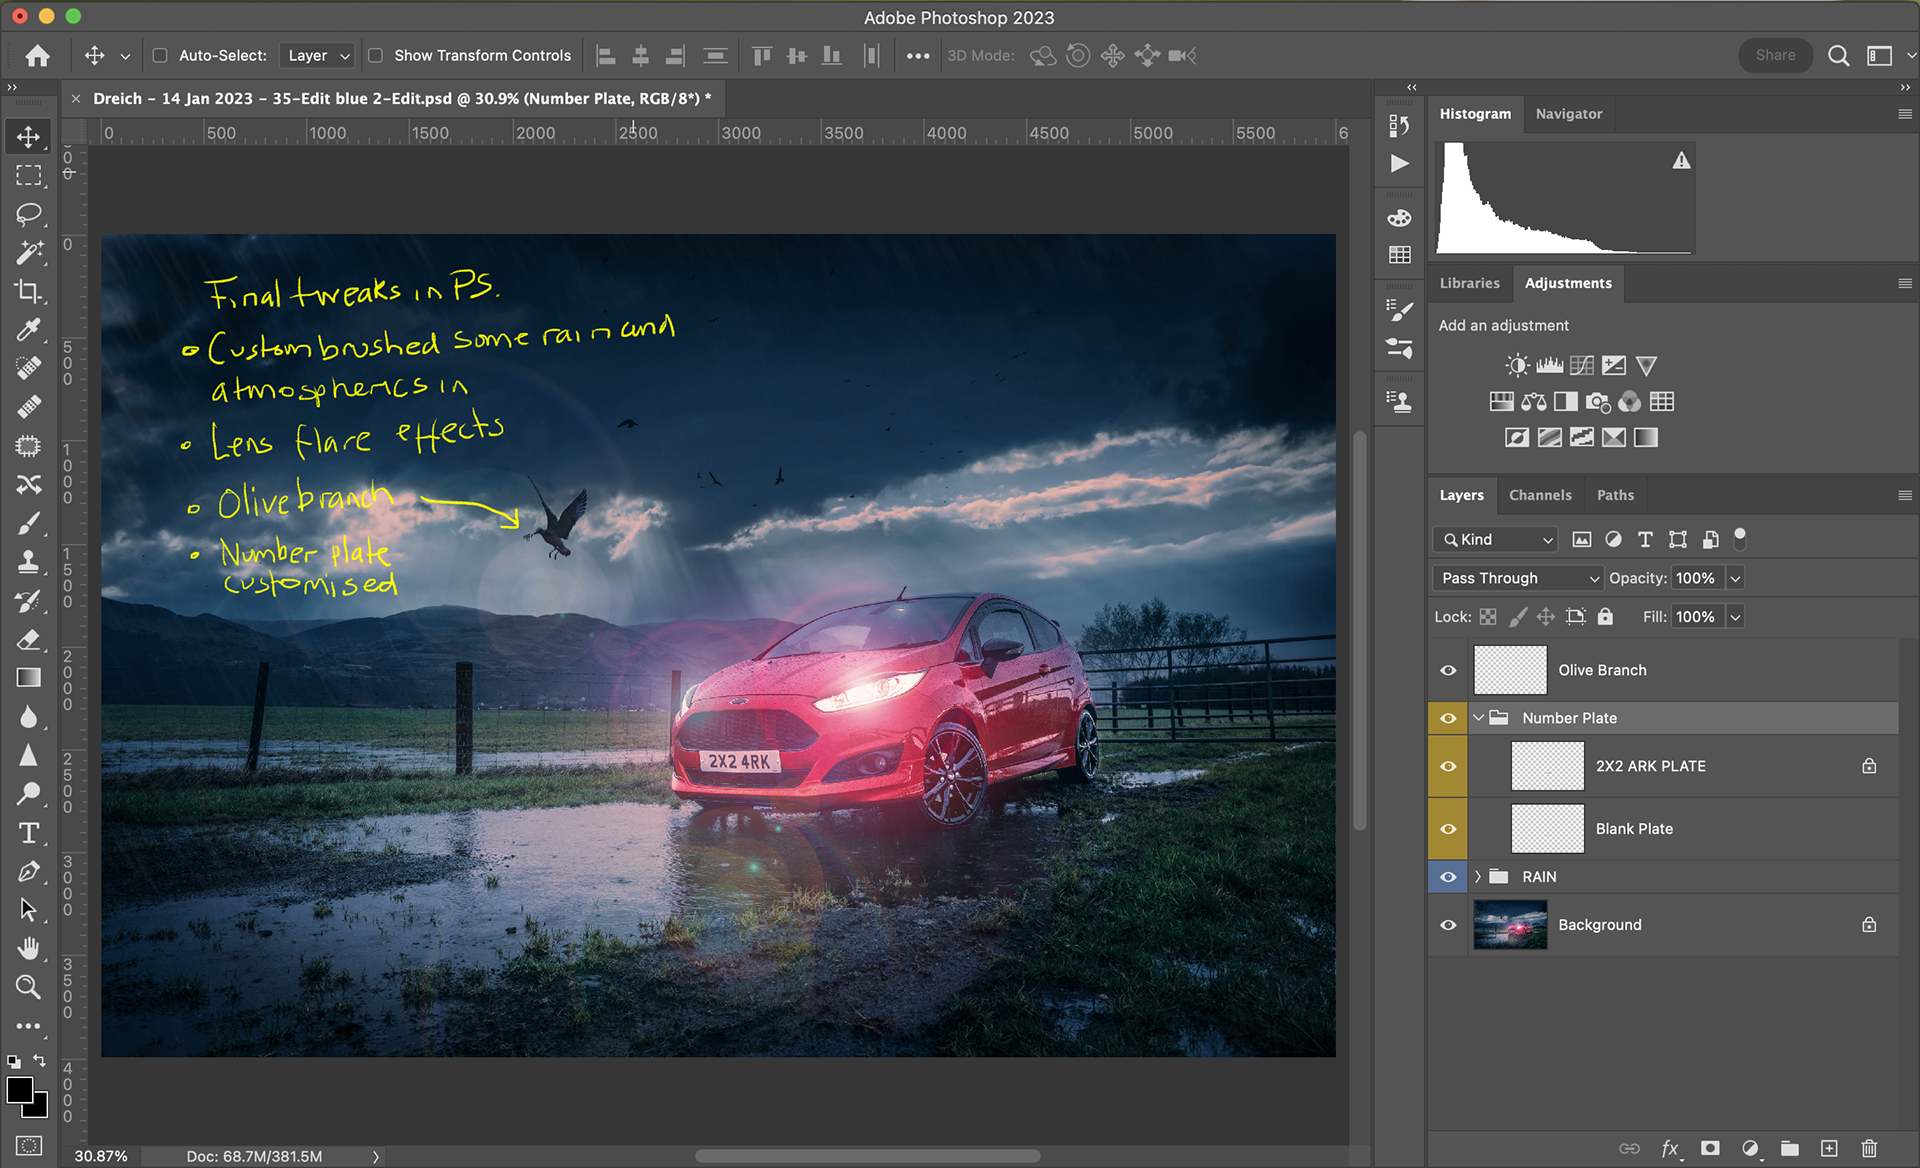
Final adjustments in PS consisted of replacing the text on the number plate, adding an olive branch into the bird’s beak, painting some rain smears over the whole thing and, with a couple of in-PS generated light flares got the front of the vehicle illuminated a bit more.
Some quick colour grading back in Lightroom to add some colour contrast and lightness in the highlights and I’m done for the moment - the cracked toilet seat could now be replaced (by the way, replacing the toilet seat took longer than this edit did; I know where my strengths lie…)

You may also like

Back to Top